This is a step-by-step walkthrough of how to set up a free WordPress (WP) site for JOUR 285 – Introduction to Multimedia Journalism. We’ll be going through a few options for free WordPress hosting and look at their Pros, Cons, and how to register your site. As registration processes and features offered by the hosting services can change at any moment, let’s go ahead and acknowledge that this information is valid as of March 2022.
The 4 options that we’ll walk through will be WordPress.com, FreeHostingNoAds, x10hosting, and InfinityFree. There are plenty of other free options that you can check out at HubSpot, but I’ve selected a few with easy WP installation to keep things simple. The other major pre-requisites that factored into my selections are services that don’t require you to already own a domain and don’t require credit cards to register and begin using (upgraded service plans can cost money, but for the foreseeable future, these have plans that are completely free to use).
WordPress.com
WordPress.com is probably the simplest and most straightforward of the routes you can take to get your blog up and running. Since it’s free, using this service has plenty of drawbacks, including: limited theme support, no plugins are allowed, limited Search Engine Optimization (SEO) control, no membership sites or e-commerce stores, no custom domains are allowed, and you’ll have WordPress.com advertisements on your site. Unless you have grand plans for your blog, this service would suffice for the minimum requirements of the course. The upsides of WordPress.com is that it is pretty secure and they automatically handle all of your site maintenance and software updates. You also get up to 3 GB of storage space. Also, did I mention that it’s free?
- Security
- Automatic site backups
- Reliable server uptime
- You’ll have WP ads that you can’t remove
- Wonky looking subdomain courtesy of WordPress
- No plugins allowed
- Very limited monetization options
- No development possible
- Limited site Themes/Templates
- Free WP blogs can be suspended at any time for violating their TOS
Registering
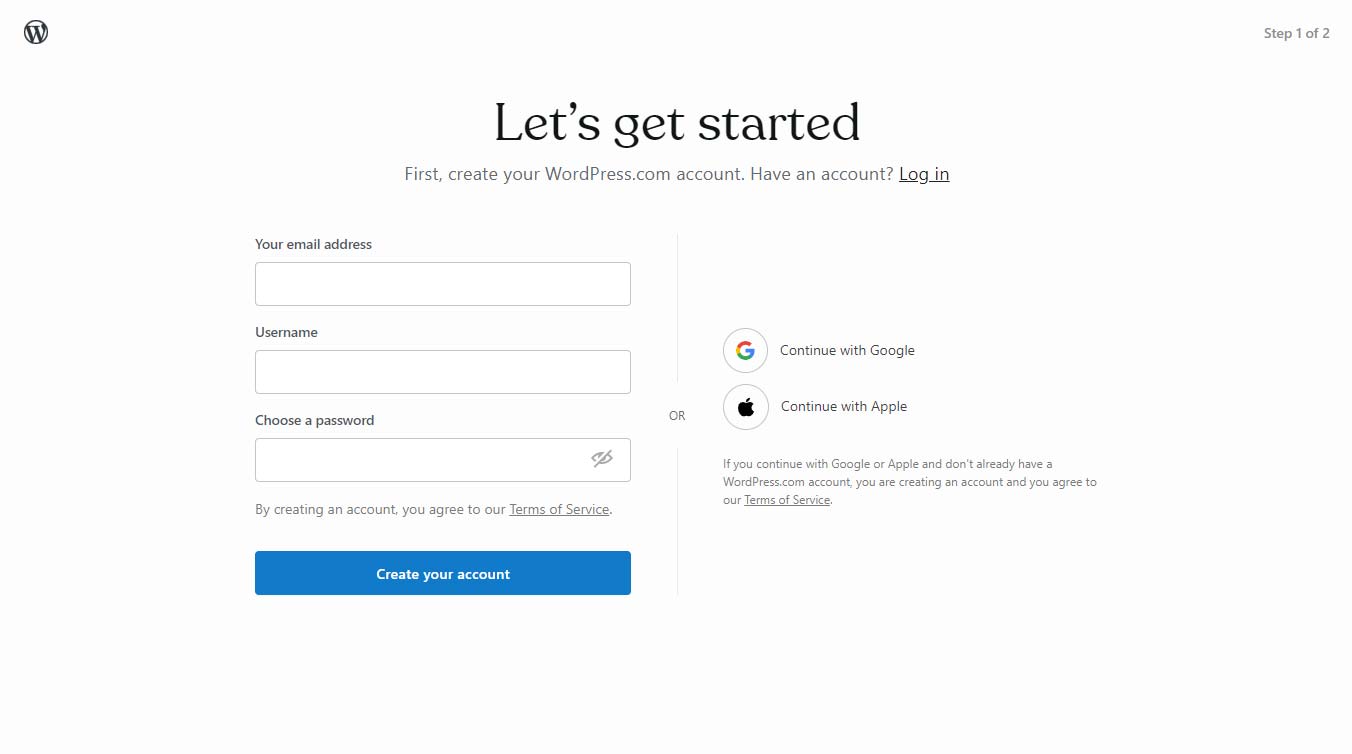
The account creation process for WordPress.com is simple. It’s a 2-step process, the first of which prompts you for your email, desired username, and password. The second step prompts you to “Choose a domain”, which is just you typing into the search field anything and then they try to sell you a bunch of domains. Don’t get fooled by their presentation — usually the third or so option down is a free subdomain that would vaguely resemble WhateverYouTyped123456.wordpress.com.
Start screen for WordPress.com
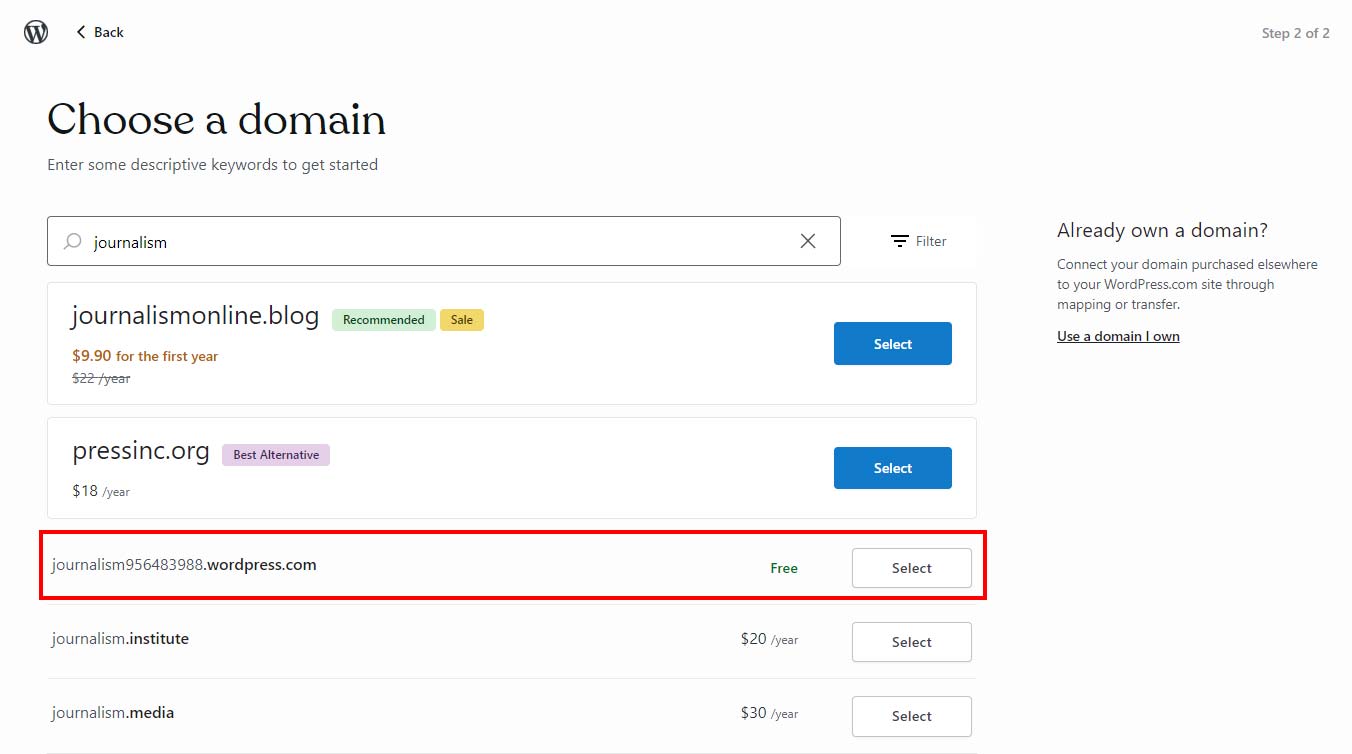
It’s not the prettiest or most elegant subdomain, but it’s free.
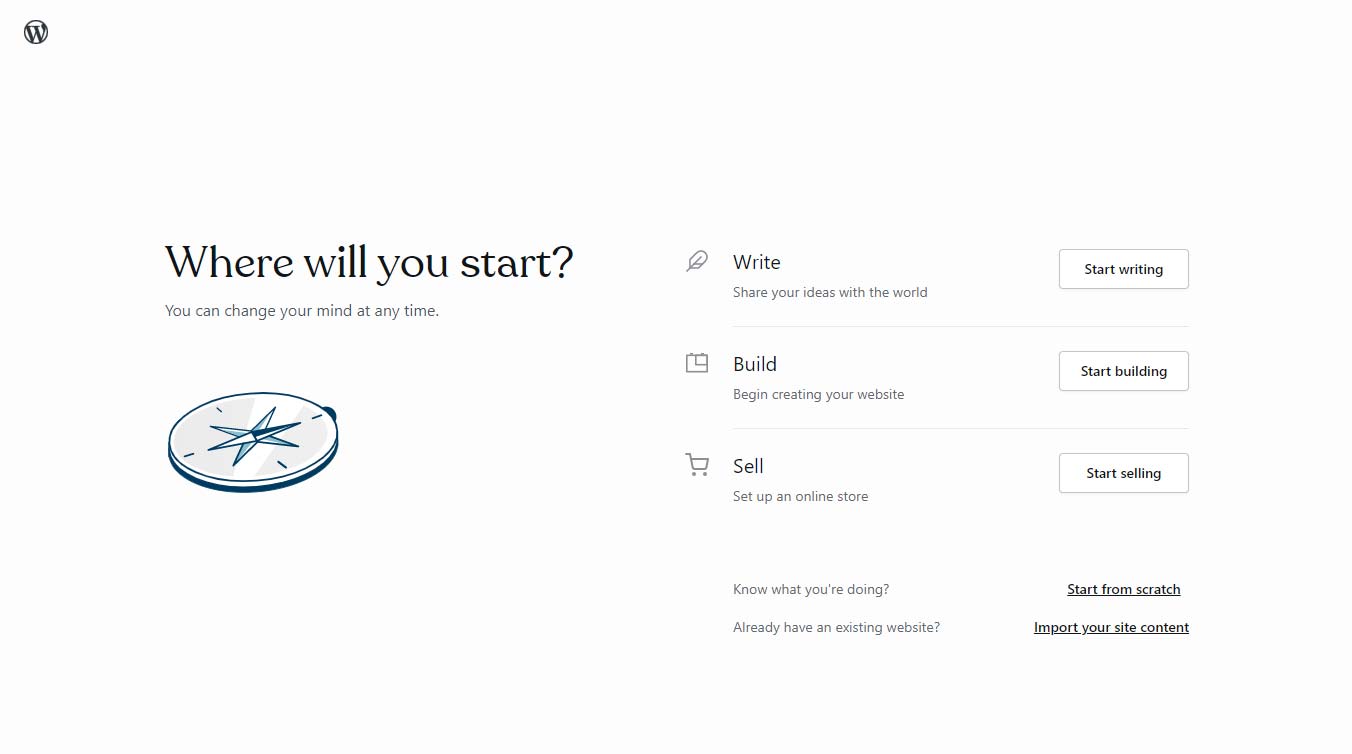
Once you select your domain, you’re sent to a page asking “Where will you start?” I’m just going to go ahead and click “Start Writing” (on the right side) since that’s what we’re going to be doing. The next screen prompts you for a “Blog name” and a “Tagline”, both of which are optional. Let’s go ahead and fill that out (you should be able to change that later).
It’s possible these options change something, but I doubt it’ll make much difference. Just click “Start writing” to simplify things. You should be able to change this later.
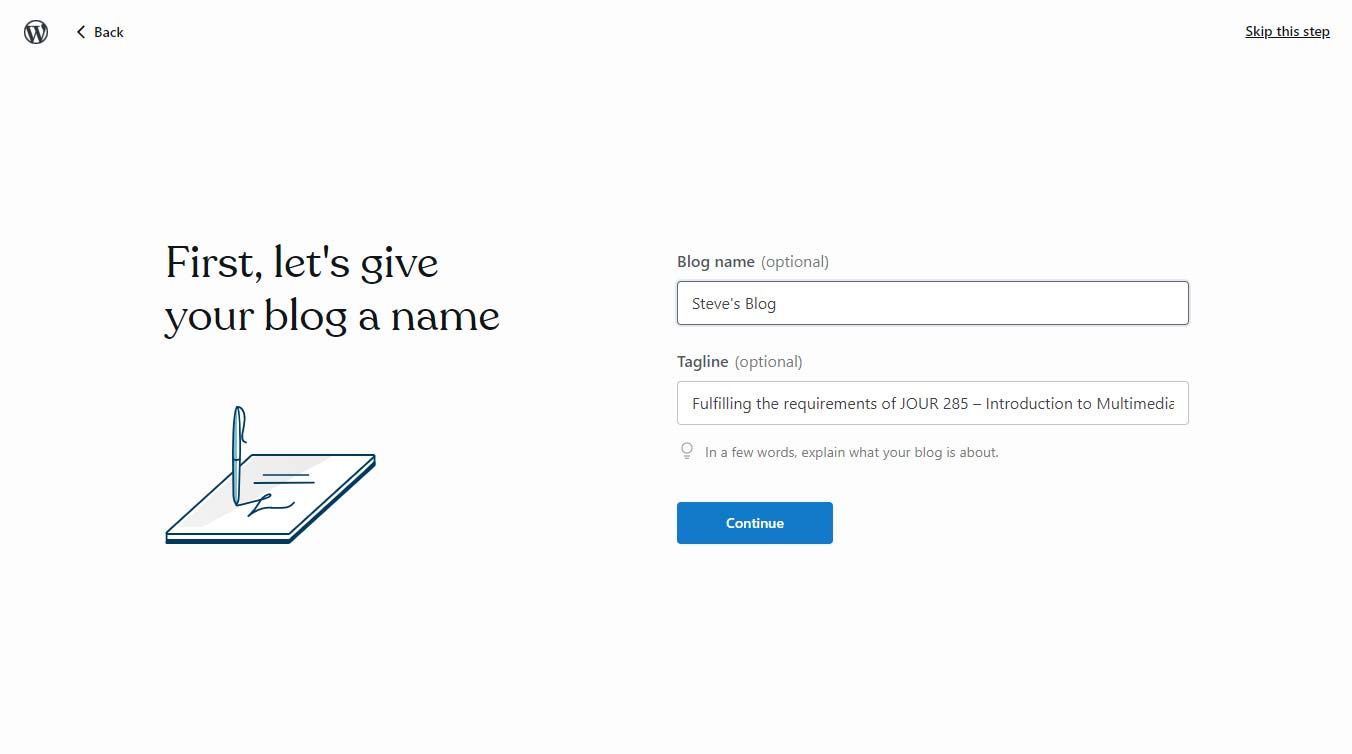
Make your blog title something clever and don’t just copy what I did.
Next, you’ll be presented with 3 options: Start Writing, Start Learning, View Designs. You can do any of those, and you probably should watch the video on blogging basics, but I’m going to click “View Designs” first. Clicking “View Designs” takes you to a page where you can select the Theme of your blog. The selection is pretty limited, but you can find one that closely enough satisfies your design aesthetics. Once you select a Theme, you’ll get to preview what your new blog will look like, and you can either click “Start with [THEME_NAME]” to proceed or go back and choose a different one.
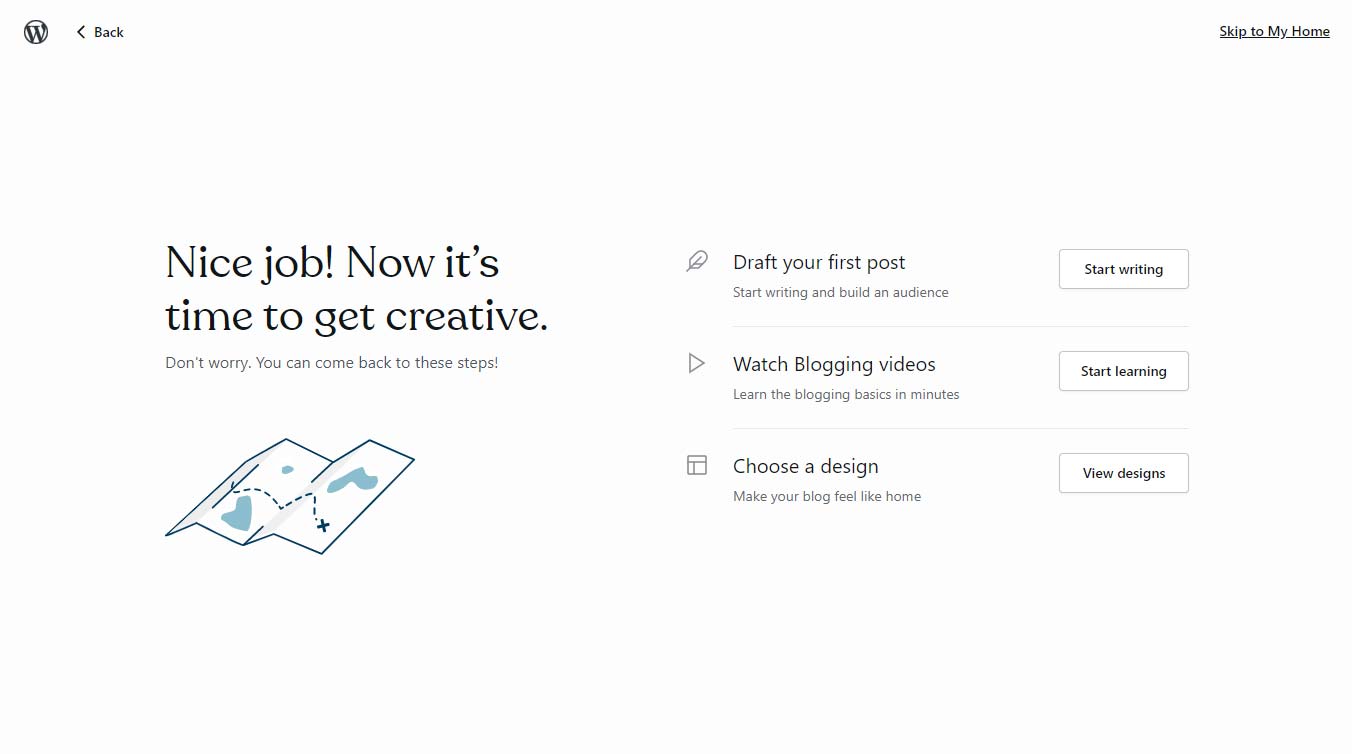
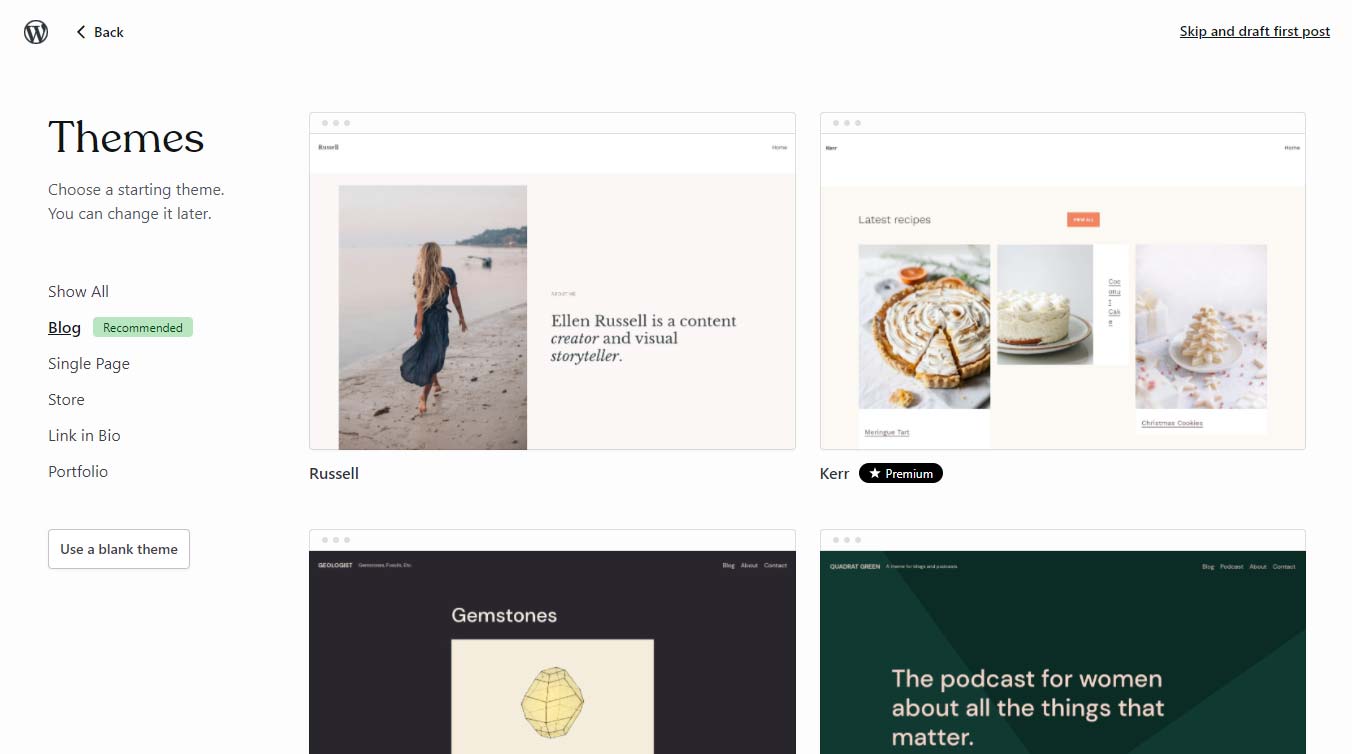
Themes are kind of like the backbone to your site, finding one that you mesh with is important.
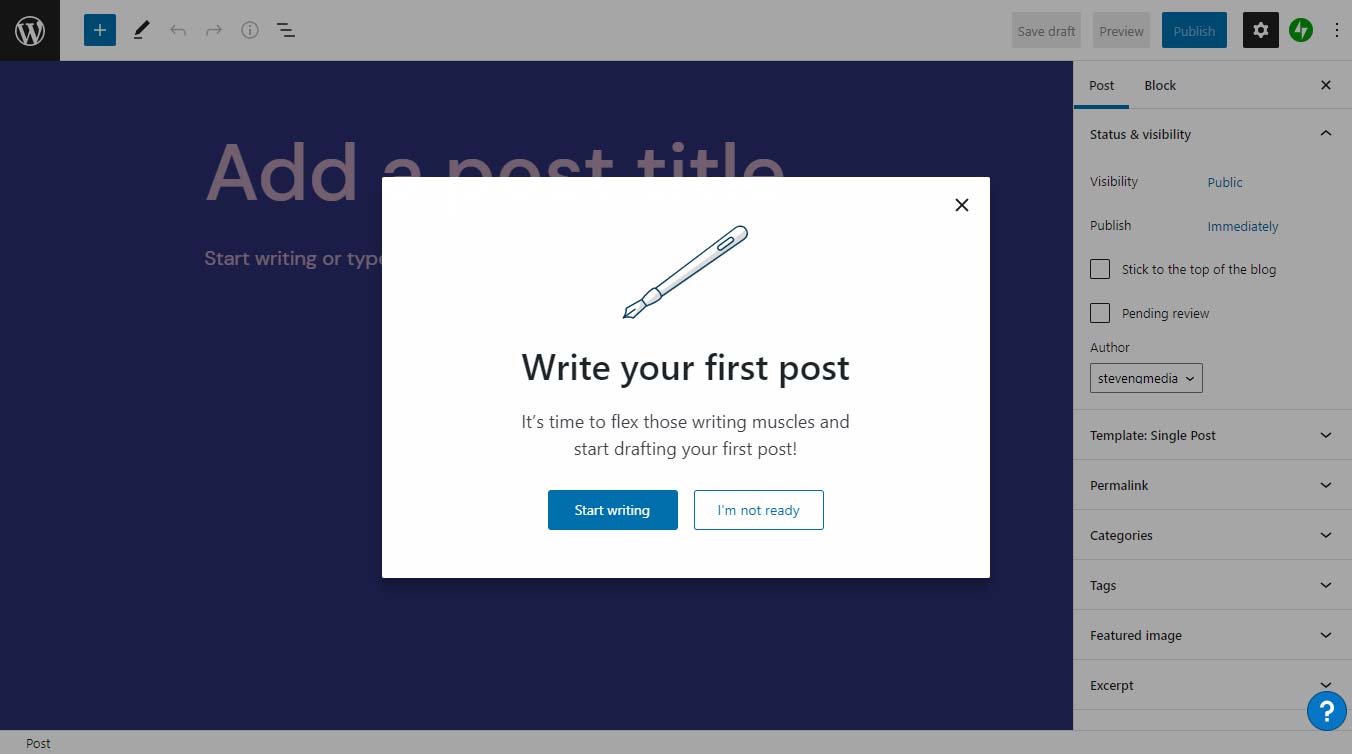
BAM! Your blog should be up and running now! A little modal window will pop up and tell you to write your first post — if you agree to start writing, it’ll allow you to start filling out the blog page. If you say, “I’m not ready”, you’ll be redirected to your blog’s dashboard. Don’t be intimidated by all the icons on the left-hand of your dashboard, just take a breather — you’ve just created your free WordPress.com blog.

Theme selection preview
FreeHostingNoAds
FreeHostingNoAds is a pretty decent option for free web hosting. As it states, it offers free hosting and none of the pesky ads like WordPress.com. They have free subdomains for use or you can even use one you already own. They also claim to offer free technical support (I only say claim because I haven’t tried to access this feature, but it is listed). The only downsides to me would be the learning curve for managing your own web hosting and the limitations of web space and bandwidth allotted (which still isn’t too bad, unless you’re expecting major traffic).
- Free hosting
- Free technical support
- Relatively simple web software installer – Zacky Tools Installer
- Your WordPress installation CAN use plugins
- Wider compatibility of themes/templates
- Limitations of FREE hosting (1 GB web space, 5 GB bandwidth monthly)
- You’ll have to use a subdomain unless you already own or want to purchase a domain
- Updating WordPress and any plugins are your responsibility
- It appears that FreeHostingNoAds by default disables the comments/discussions feature of WordPress posts. You have to install a plugin like wpDiscuz to work around the disabled comments. *For this reason, I don’t think I’d ever recommend using FreeHostingNoAds, and I regret that I included it on this list.
Online Reviews for Free Hosting No Ads: 3.5/5 from TechRadar, 3.5/5 from FortuneLords
Registering
Step 1: At the signup page, you’ll be presented with 3 options for which hosting plan you can choose. Since we don’t want to pay anything, go ahead and choose “Free Hosting”.
Below the hosting options is a field for choosing a domain name. Unless you already have a registered domain, go ahead and leave it blank and click the “Continue” button at the bottom to move on to the next step.
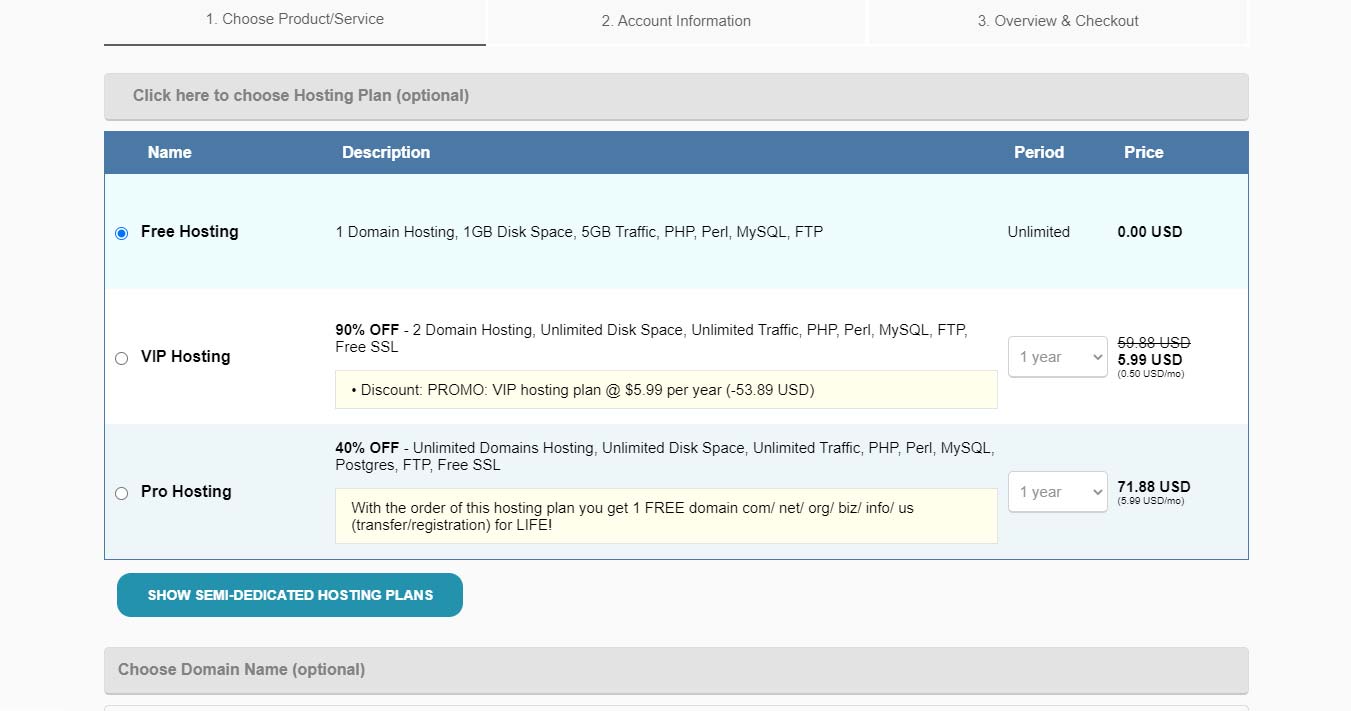
Select “Free Hosting”
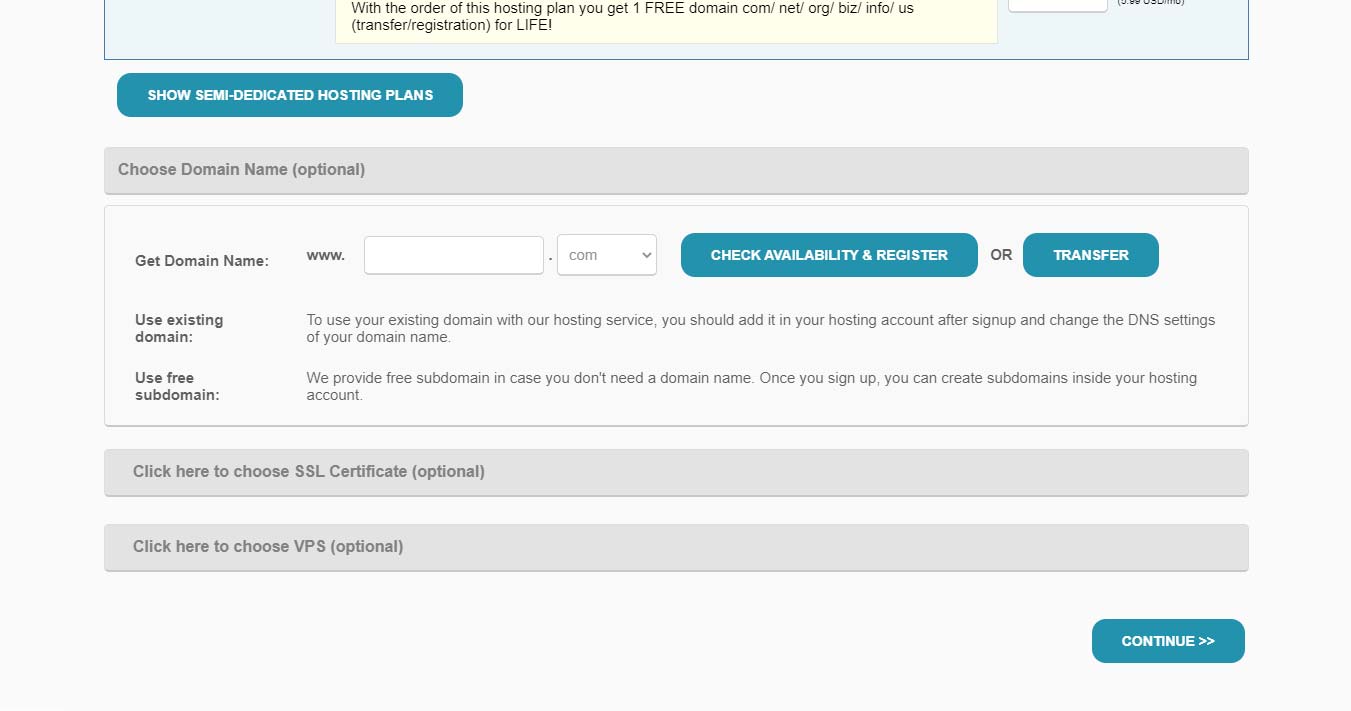
Unless you have a domain, leave the domain name field blank and click “Continue”.
Step 2: The next screen will show you the items in your cart (you can ignore this section) and also collect the registration information for your account. Fill this out and continue to the next step.

Make sure you keep records of your Client ID and your login email.
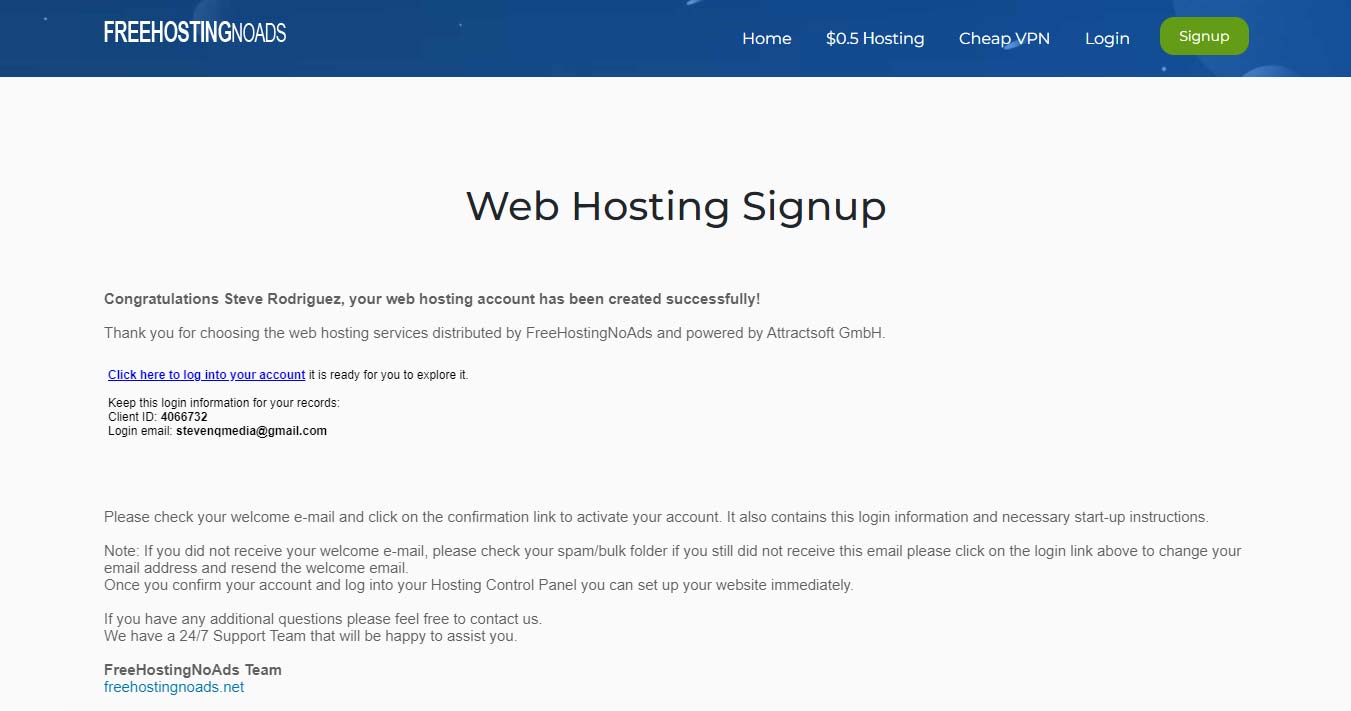
After filling out the registration portion of the process, you should be taken to a screen that has a message something like: “Congratulations YOUR_NAME, your web hosting account has been created successfully!”. It should also have login information for this account that you should store somewhere safe.
Step 3: You’ll receive an e-mail at the e-mail address that you included as part of your registration. Go ahead and open the e-mail and click on the link to confirm your account. If you try to login to your account without confirming, you may receive an error when loading the page.
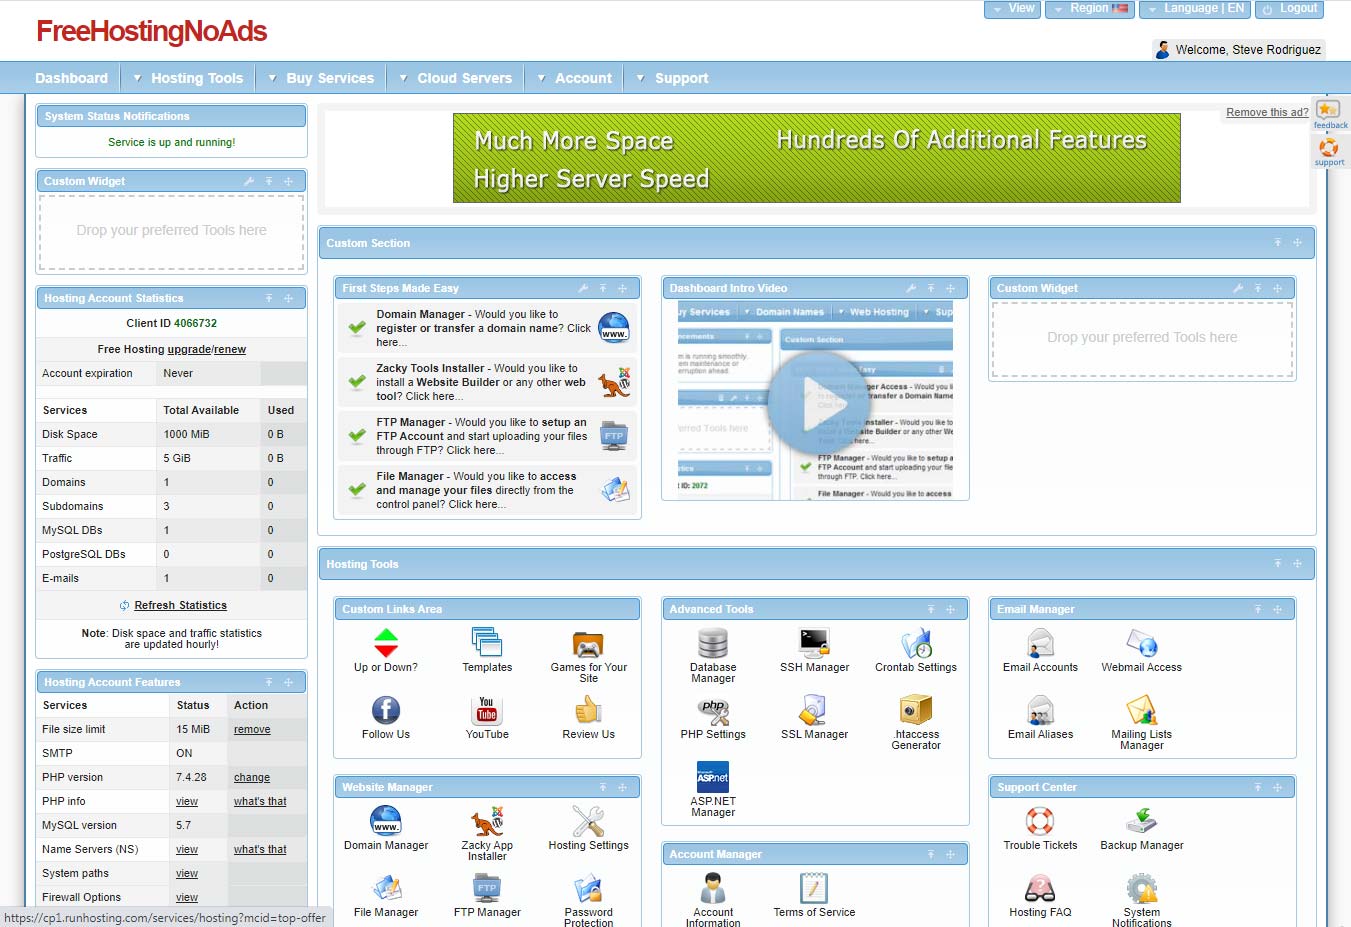
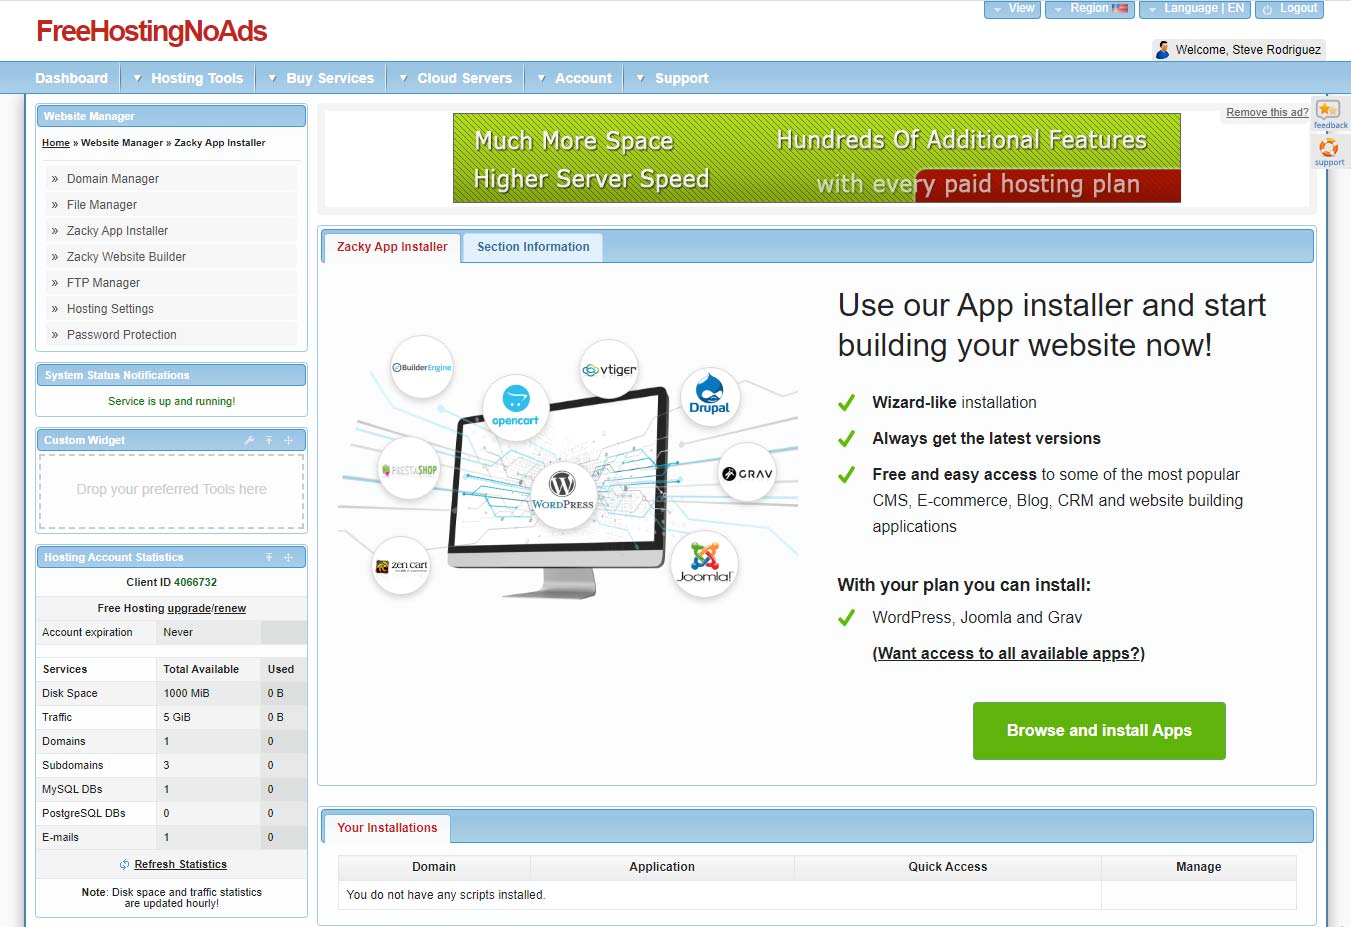
This is your FreeHostingNoAds dashboard. It may look a little intense, but most of this stuff you won’t need to touch.
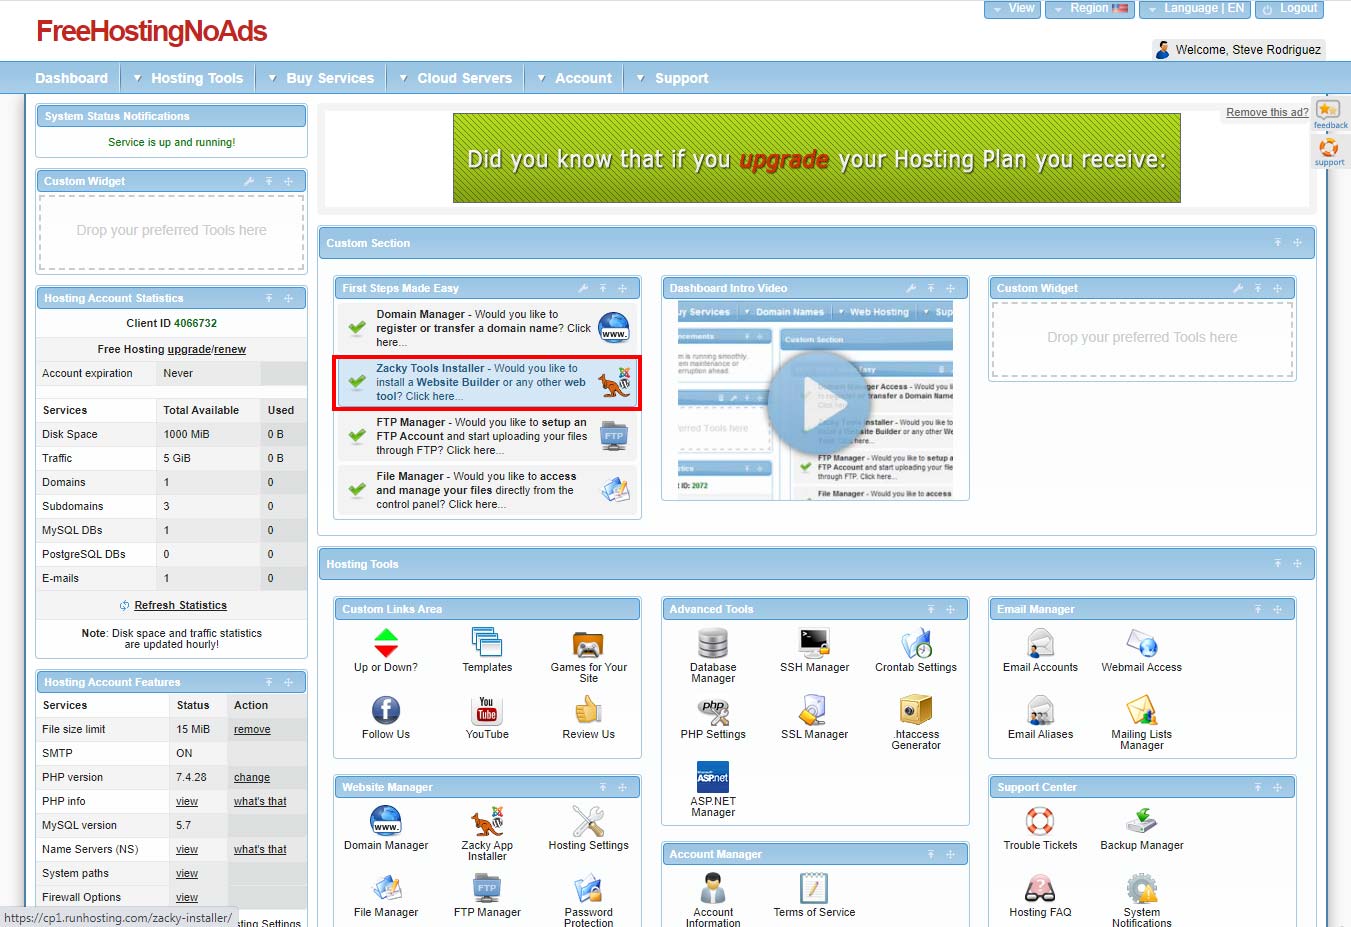
Zacky App Installer link
Step 4: Login to your account, and you’ll be taken to your hosting dashboard — this is where you will manage your account. The first thing we’ll do is install WordPress on our site. Under “First Steps Made Easy”, find the “Zacky Tools Installer” and click the link. You’ll be directed to a new screen that shows the “Zacky App Installer”. Click the big green button that says, “Browse and Install Apps”.
The Zacky App Installer start screen
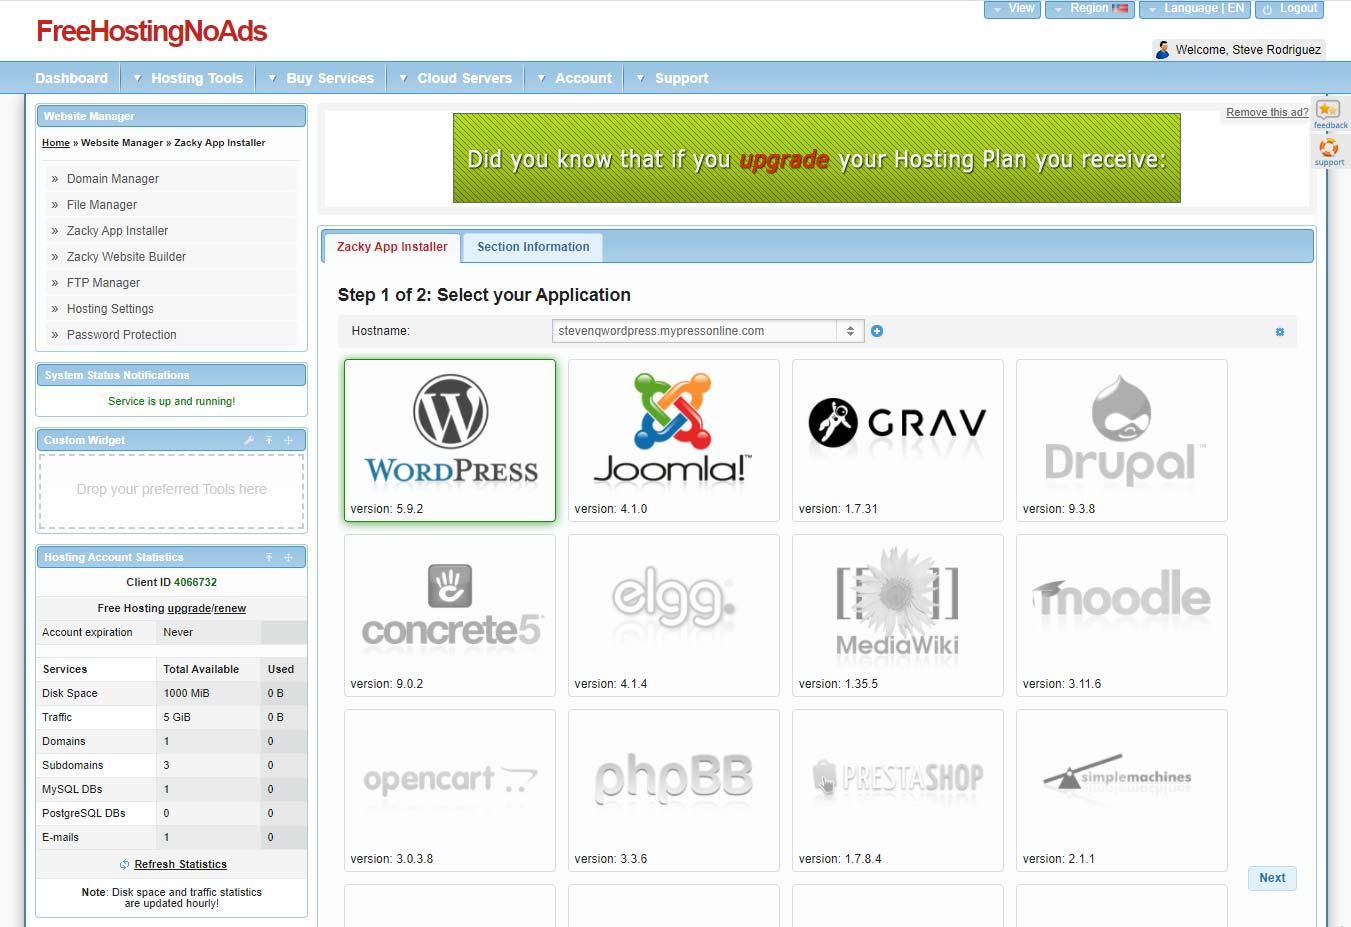
Select WordPress
You’ll then be prompted to attach the WordPress to either an existing domain (which you probably don’t have) or to a free subdomain. Clicking the tab for “Create a Free Subdomain”, you’ll have the option to type in a desired subdomain name and then select the domain that it will exist under. Fill it out and click “Create”, and you should receive a success message in green at the top of the page. Now you can select which application(s) you want to install on your subdomain. We want WordPress (it should be the first option), make sure it is selected and then click “Next” at the bottom right. This should take you to Step 2 of 2 of the Zacky App Installer, where you’ll set up your WordPress login info. Create an administrator username and password, and then click “Install Application”. You should see a modal window pop up and update you on the progress of the installation. Upon successful installation, you should see a congratulatory message along with links to view your site and also to access the admin dashboard.

x10hosting
x10Hosting is another cloud hosting option with easy software installations. x10Hosting touts having SSD servers that provide lightning quick response times that are crucial for user experiences and search engine optimization. In addition to being optimized for WordPress, they offer unmetered bandwidth and disk space — a real perk for anyone that is expecting high amounts of web traffic.
- Free hosting
- Fast SSD servers
- Unmetered
disk space and* bandwidth - Relatively simple web software installer — Softaculous App Installer
- Your WordPress Installation CAN use plugins
- Wider compatibility of themes/templates
- *500 MB Storage (the plan claims 500 MB initial disk space w/ free upgrades)
- Updating WordPress and any plugins are your responsibility
- Learning to manage your web hosting can be time consuming and a pain
- There’s a few more steps to create your account and hosting than I would prefer.
- Their online reviews are NOT good. Trustpilot Reviews: 2.1/5 (13 reviews)
Registering
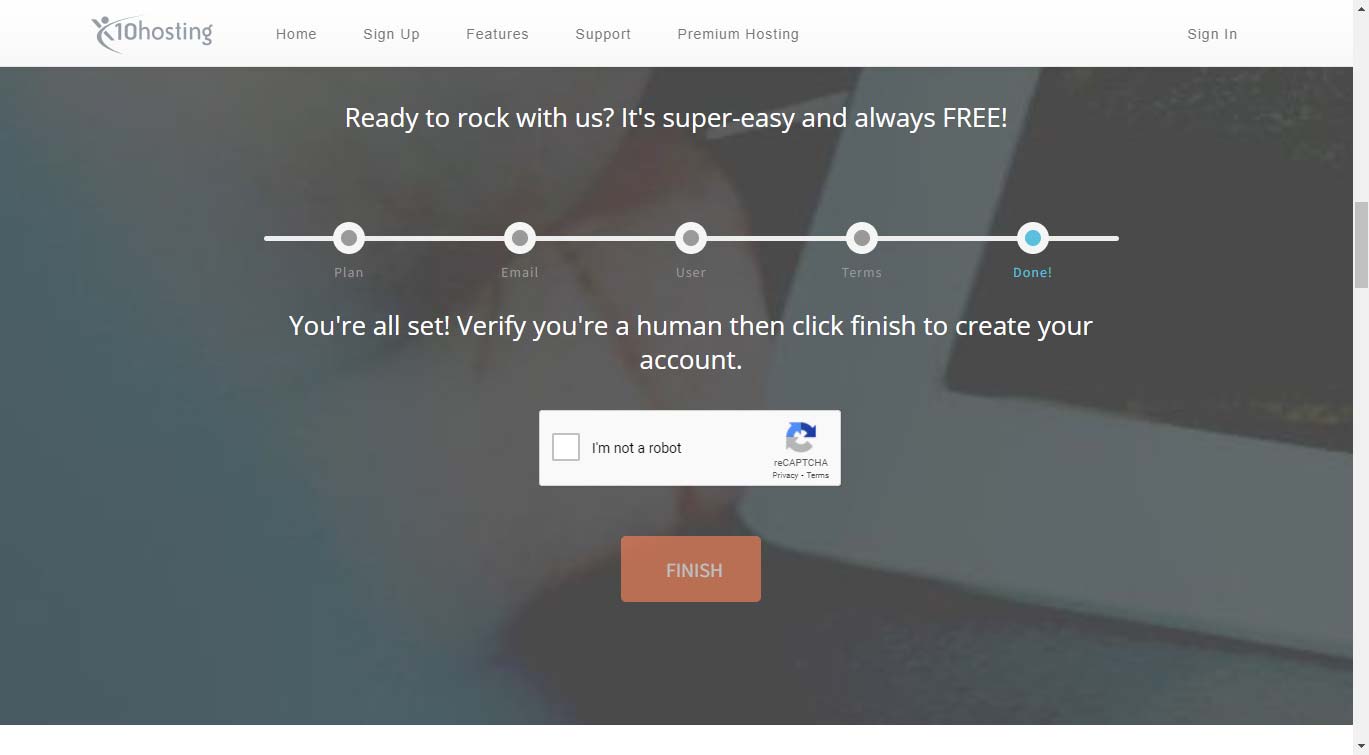
Step 1: At the registration start page, select the “x10 Free” option. and click “Continue”. You then have to include an e-mail address, so fill out the field and then click “Next”. The next prompt is for a username and password, again fill out the fields and continue onward. Next, review the Terms of Service and then check the box to agree to the terms (assuming you agree) and continue to the next part. As it turns out, you must read the TOS before proceeding (they just outed me as a lazy person). The last part is just checking a box to confirm you’re not a bot.
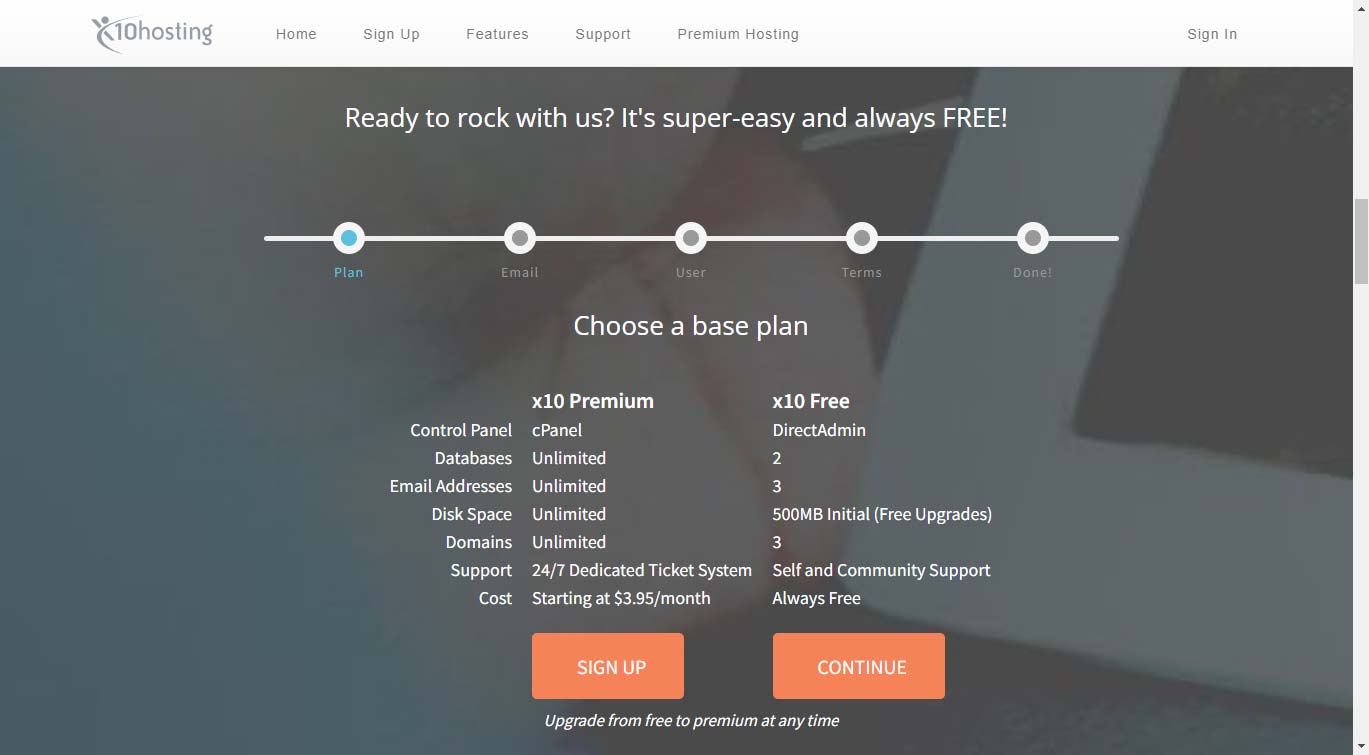
x10Hosting registration page
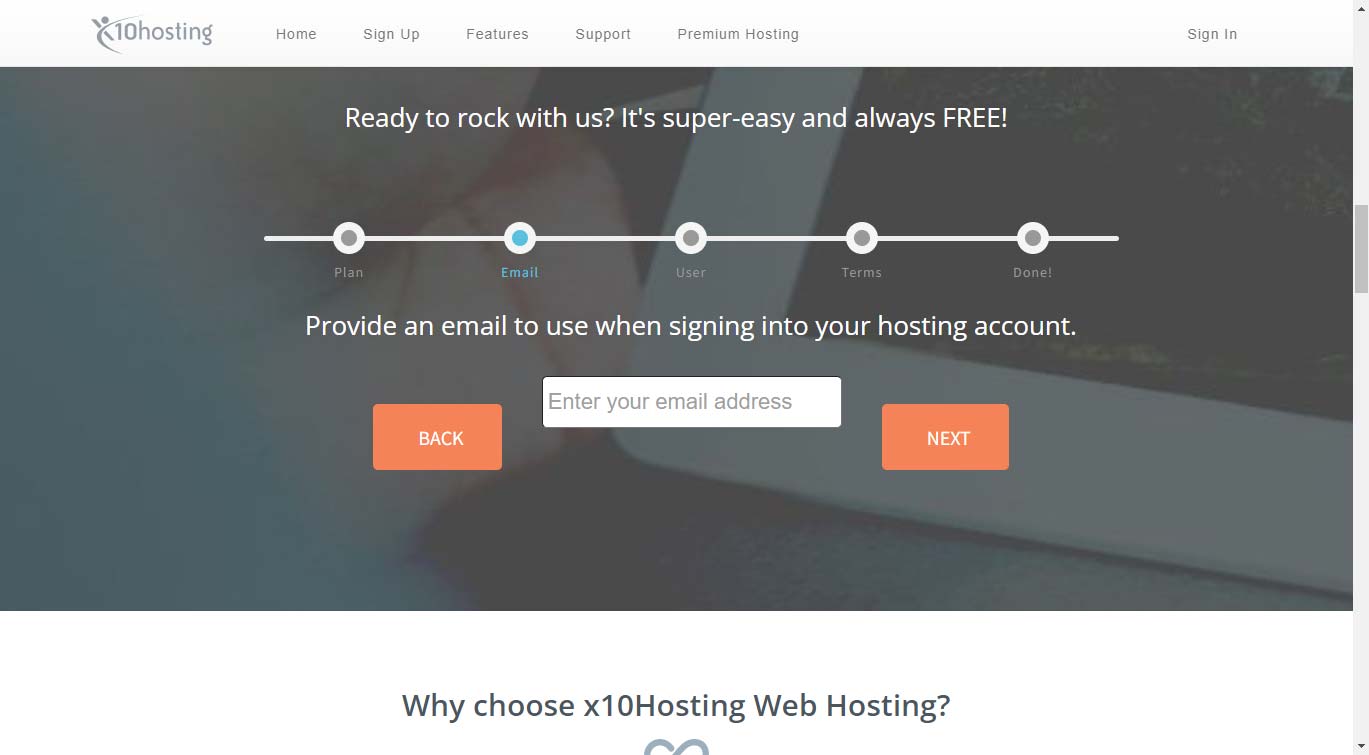
Finish the steps to register your account.
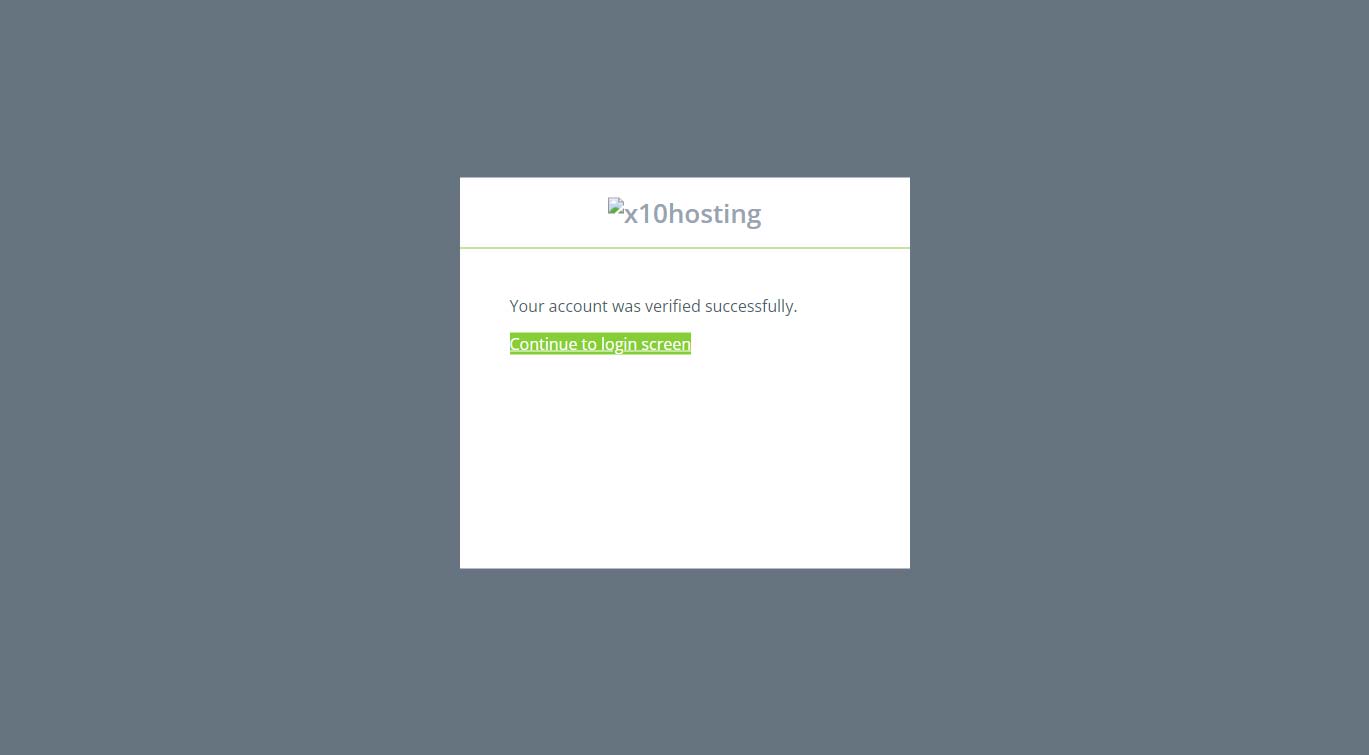
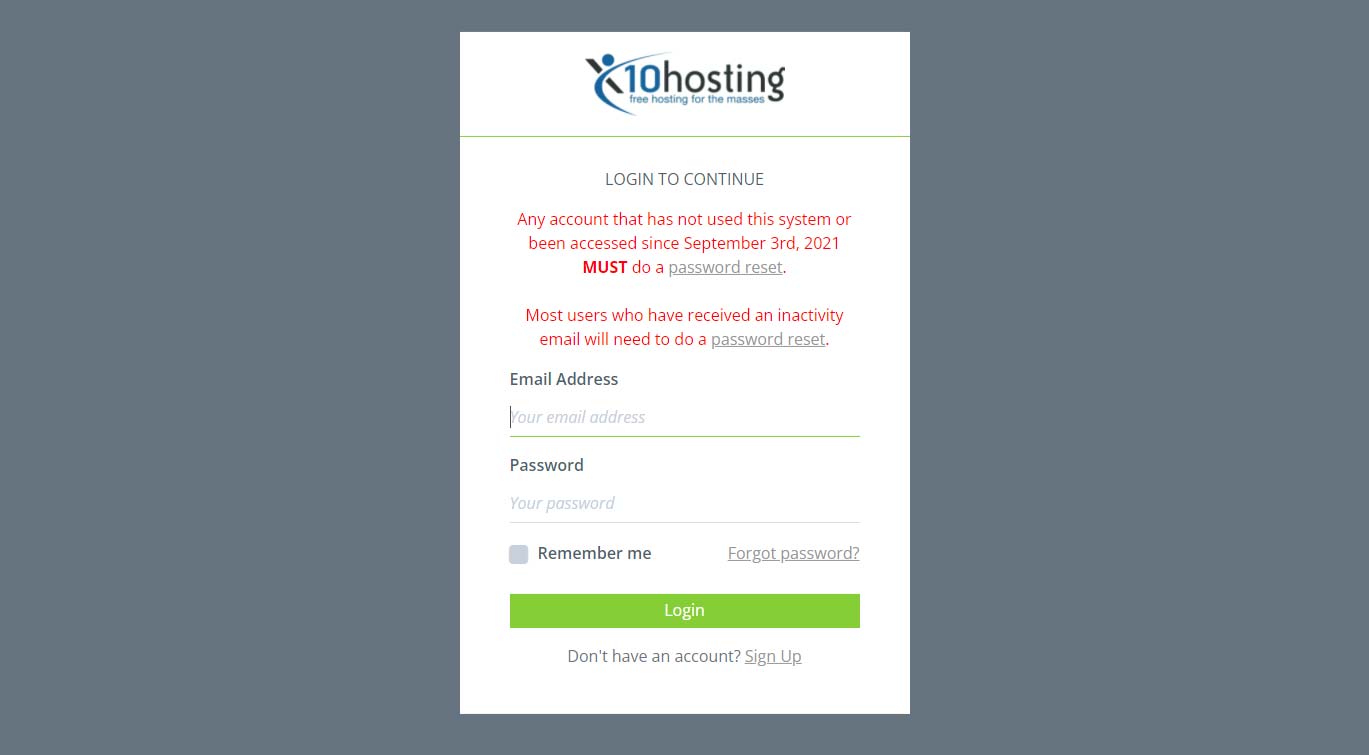
Step 2: After the registration, you’ll receive an email that asks you to click the link to confirm your account and complete the registration process. Follow the link and then login to your account. Once you’ve logged into your account, you’ll see that it appears empty — you’ll need to add a service. On the left hand side of the dashboard, click on “Services” and then click the “Add new” button.
Step 3: Go ahead and pick a domain name and domain extension, it should take the form of something like www.mydomainname.x10.mx. For me, I see only three domain extensions available: .x10.mx, .x10.bz, and .elementfx.com. Also create a secure password to use for this account and click the “Create” button to continue. Once your domain has been created, the page will refresh and update with your new service.
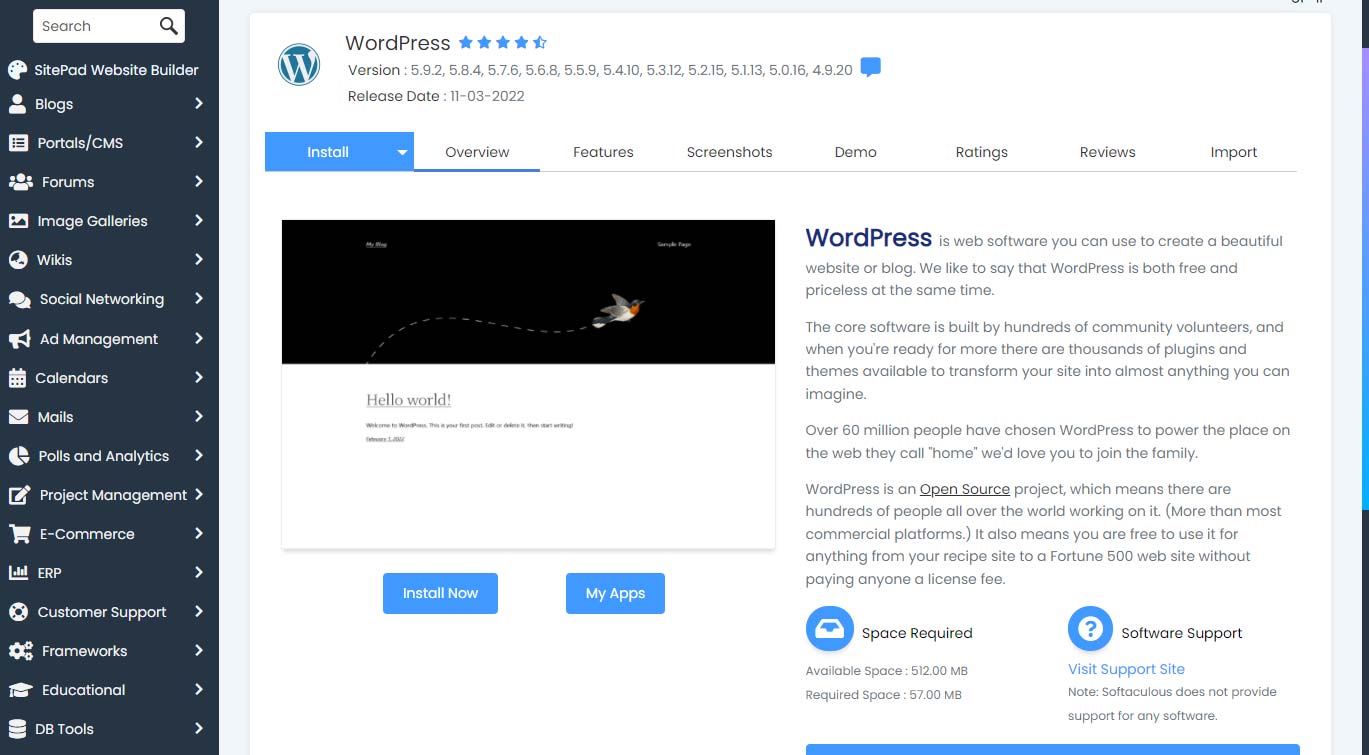
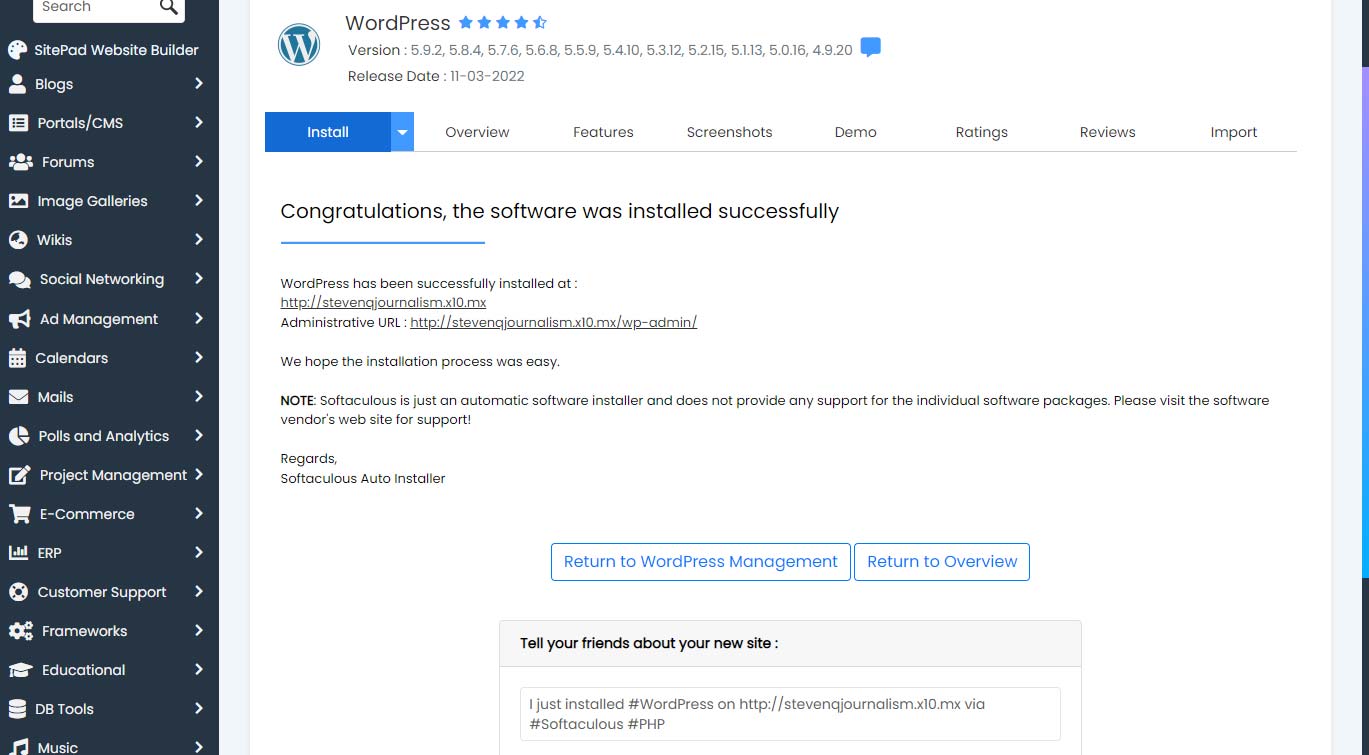
Click on your new service name (in green), and be aware that your service name should be unique to your account (don’t worry that your ID [user name] is different from mine). This will take you into your hosting service manager; from here, click the blue “Hosting Control Panel” button. This will open your hosting service dashboard in a new tab (or window). From here, on the left side of the dashboard (the blue navigation bar), go to the top icon (menu) and find “Softaculous Apps Installer” and expand the drop-down to reveal the application options. Find WordPress and click it. You’ll be taken to a screen where you can install WordPress, so click the “Install Now” button. You’ll be given options of where to install the software. For the protocol, leave it as http:// unless you have an SSL. The domain should already be preselected, if not, select yours. The last field allows you to specify the directory that WordPress will be installed to. On my account, the default value was set to “wp”, but we want to install to the root, so leave this field as empty and proceed to the Site Settings and Admin Account fields. Under “Site Settings”, leave “Enable Multisite” and “Disable WordPress Cron” unchecked. For “Select Plugin(s)”, leave those alone for now as well. Leave “Advanced Options” and “Select Theme” to their defaults as well. Go ahead and click “Install” at the bottom. You can add an e-mail address at the bottom to get a copy of the installation details, but that isn’t required. Once WordPress finishes installing, you’ll be redirected to a success message page that will give you the address of your new WordPress site and the admin login; be sure to log those for safe keeping.
Congrats! Your new WordPress should be good to go!
This is the account login screen for x10Hosting.
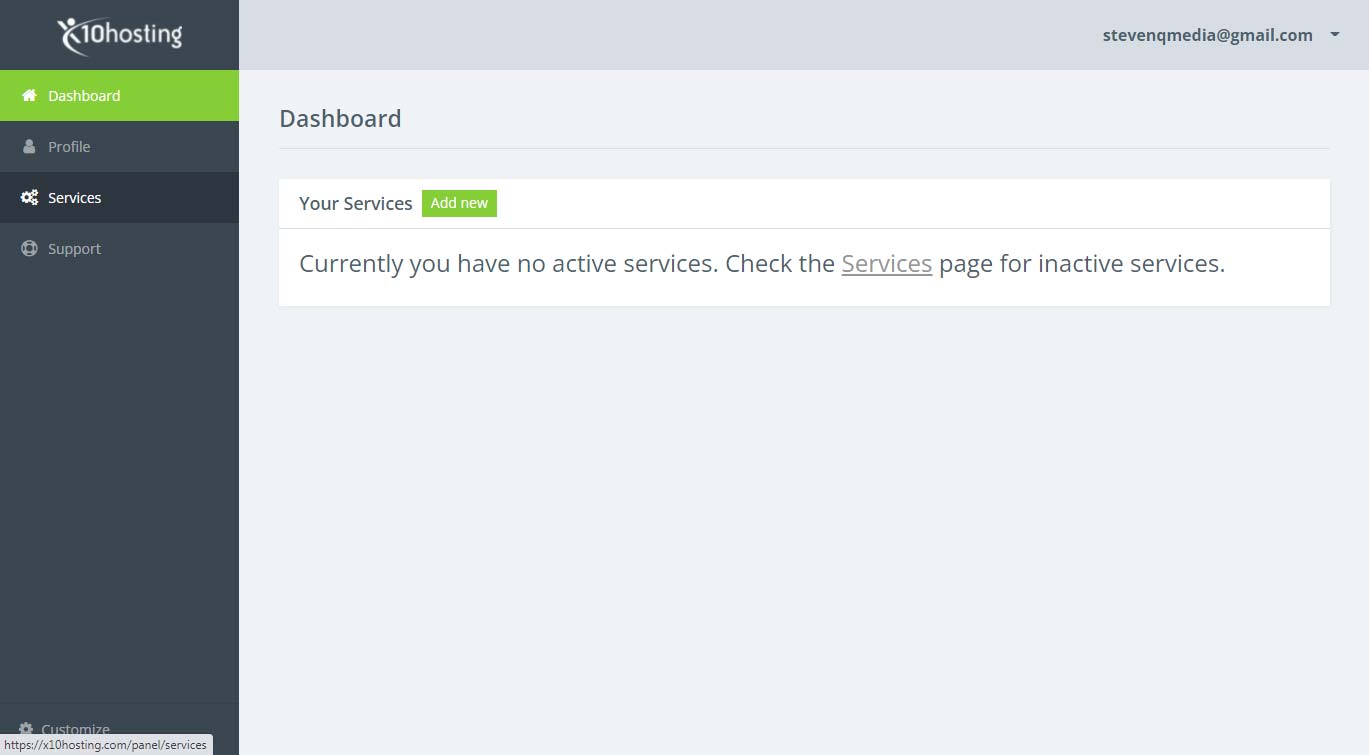
Inside the dashboard of a freshly created account
You have a little more flexibility in domain name choice here than you do with WordPress.com.


Inside your domain dashboard
Locate your Softaculous Apps Installer to install WordPress.
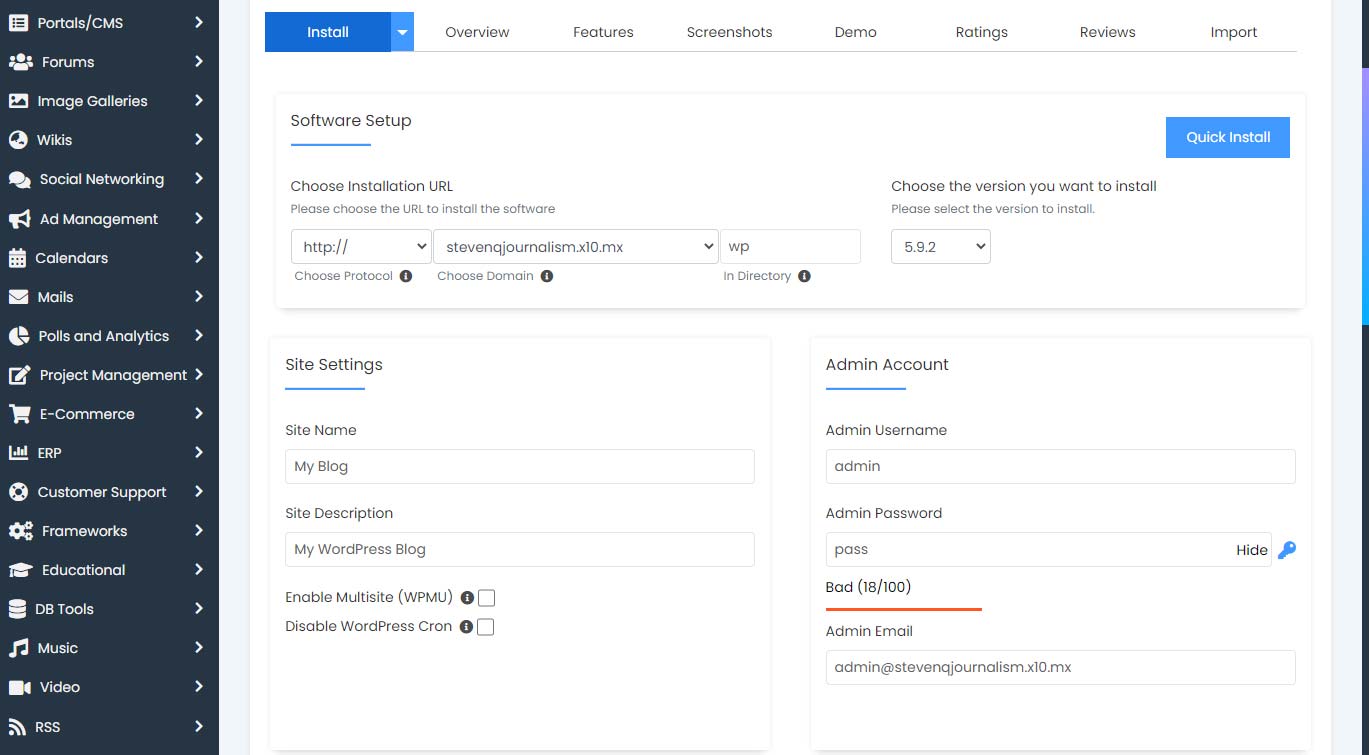
Give your site a name and description, and create an admin username and secure password. Most of the other fields can be left as default values.
Infinity Free
Infinity Free offers speed, 5 GB storage and unlimited bandwidth. It also features the Softaculous Installer for apps like WordPress. They make the claim to being the fastest free hosting option in the world. They allow you to host domains you own or you can pick from more than 25 free subdomains and domain extensions. They also claim to offer a free SSL on all your domains (I haven’t verified this feature, as the account I created still shows as not secure, but unless you’re running an e-commerce site, this matters less).
*Note — Updated as of 4/11/2022. A lot of accounts with WordPress installations appear to be having errors in connection. When users are trying to access their website, they are receiving messages like “Error establishing a database connection”. Furthermore, when they try to check/access their database or files via phpMyAdmin, there seem to be no databases available. While I have one installation that is working, the several that I manage that are not working appear to have a common link of MySQL Hostname starting with “sql102”. Tech support threads active as of 4/10/2022 also share common issues with the same MySQL Hostname. As Infinity Free is proving to be unreliable, I am renouncing my endorsement of their services and I apologize for any inconvenience in dealing with their services.
- Free hosting
- Fast servers
- Up to 5 GB disk space
- Unmetered bandwidth
- Relatively simple web software installer — Softaculous App Installer
- Your WordPress Installation CAN use plugins
- Wider compatibility of themes/templates
- Unreliable servers
- Mediocre online reviews. Trustpilot Reviews: 3.7/5 (654 reviews)
- Updating WordPress and any plugins are your responsibility
- Learning to manage your web hosting can be time consuming and a pain
- It stands out in my mind that they used to offer unlimited disk space, but has since decreased the allotment to 5 GB (which you’d still never likely max out, especially for this class). So it’s possible as their popularity grows, other features may get scaled back as well.
Registering
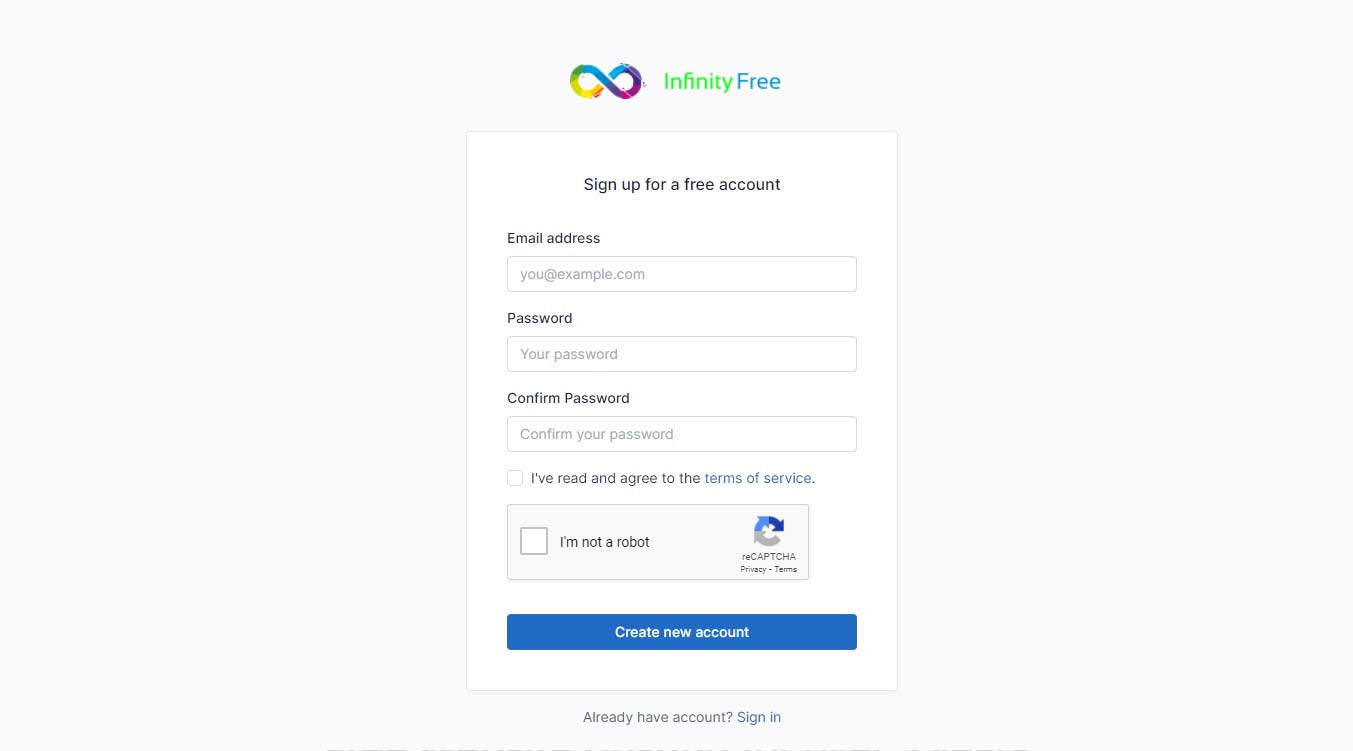
Step 1: From the signup page for Infinity Free, fill out the signup form for your free account and click the “Create new account” button.
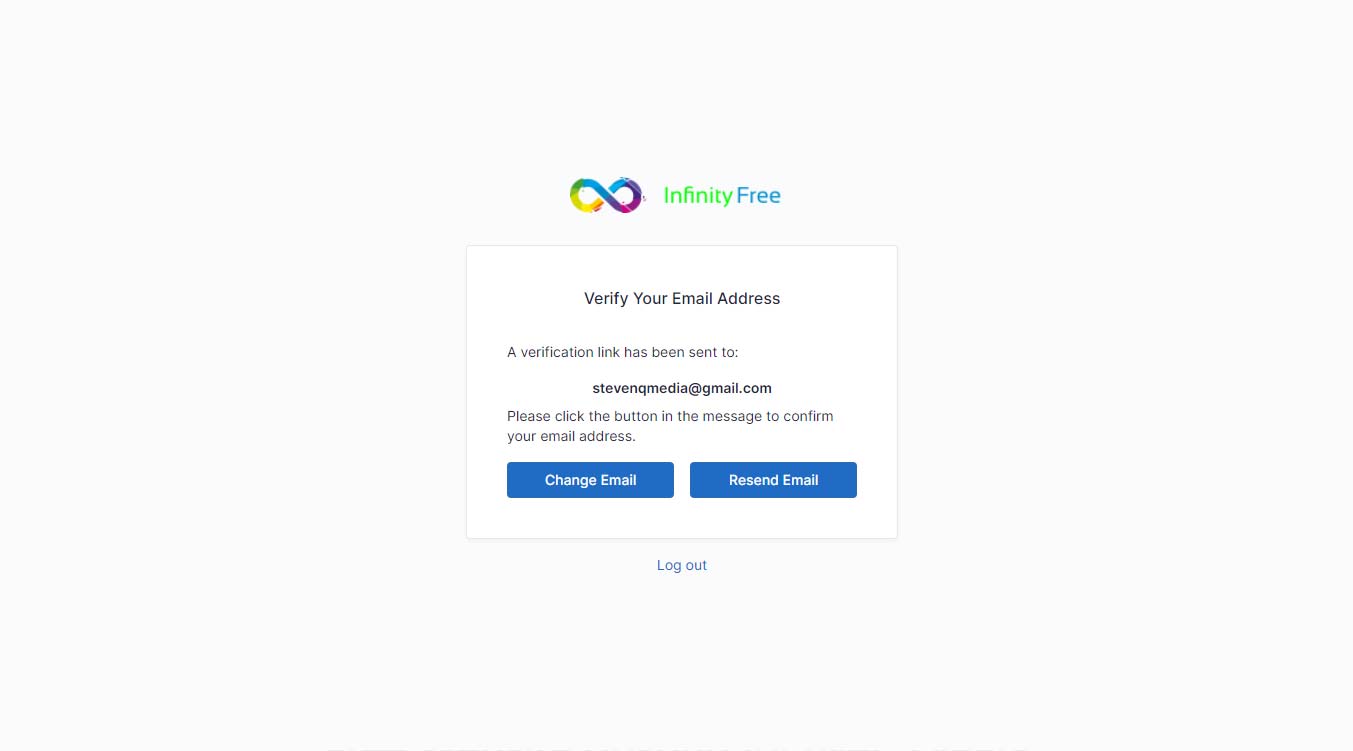
Step 2: Once you’ve created your account, you’ll receive an e-mail to verify your e-mail address. Open up the e-mail and follow the link to finish creating your account. The link will take you to your account management page.
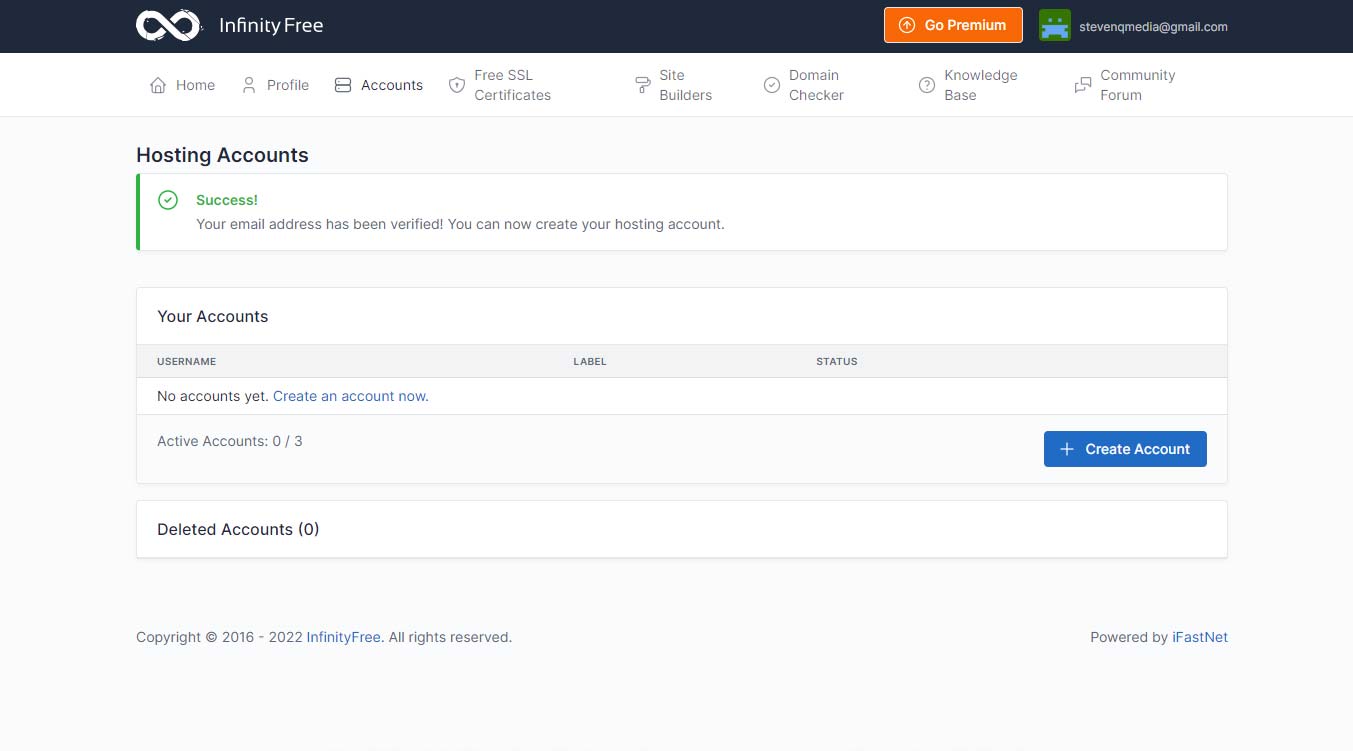
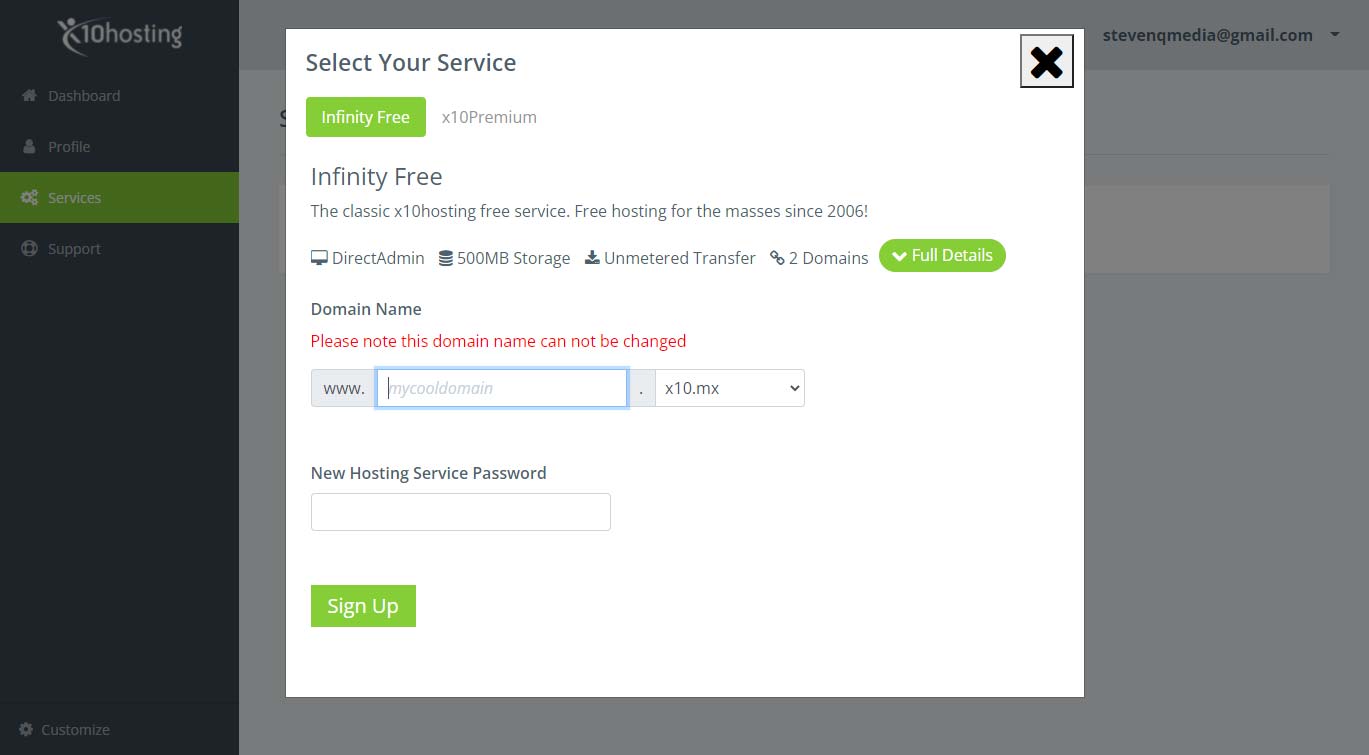
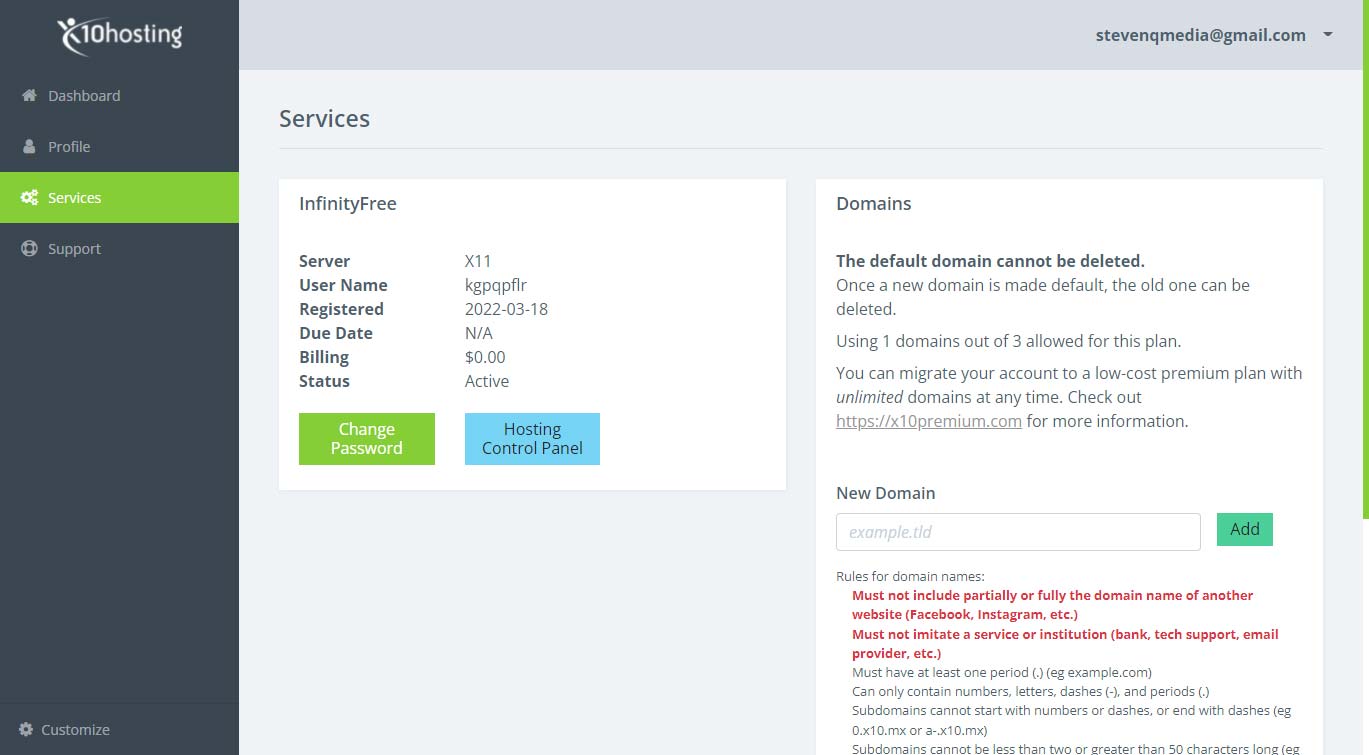
Step 3: You’ll see a list of your accounts (which should be blank), and then a “Create Account” button. Click that button to begin creating your hosting account. To keep things free, let’s create a subdomain. Fill in your desired subdomain name, and select whatever domain extension that appeals to you. Free domain extensions that are available to you include: .greatiste.net, .42web.io, .freecluster.eu, .infinityfreeapp.com, .lovestoblog.com, .rf.gd, and .epizy.com.
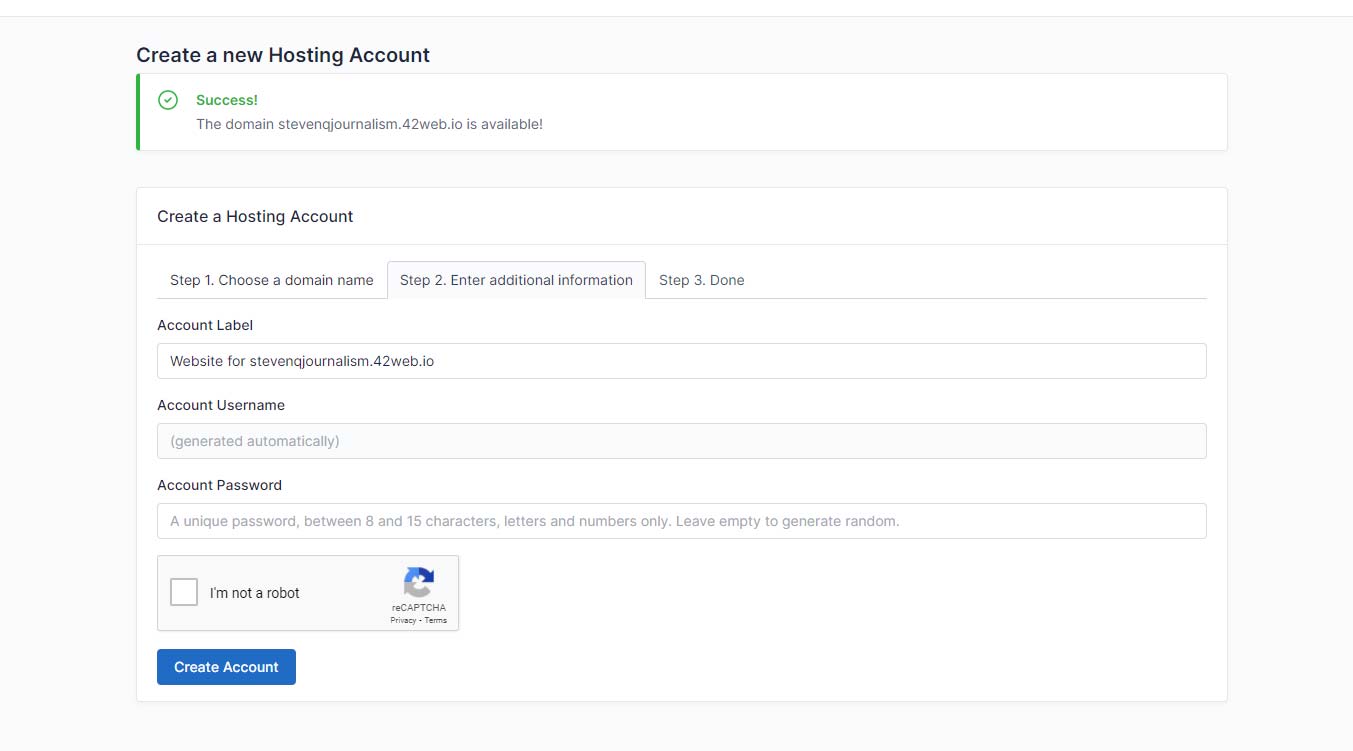
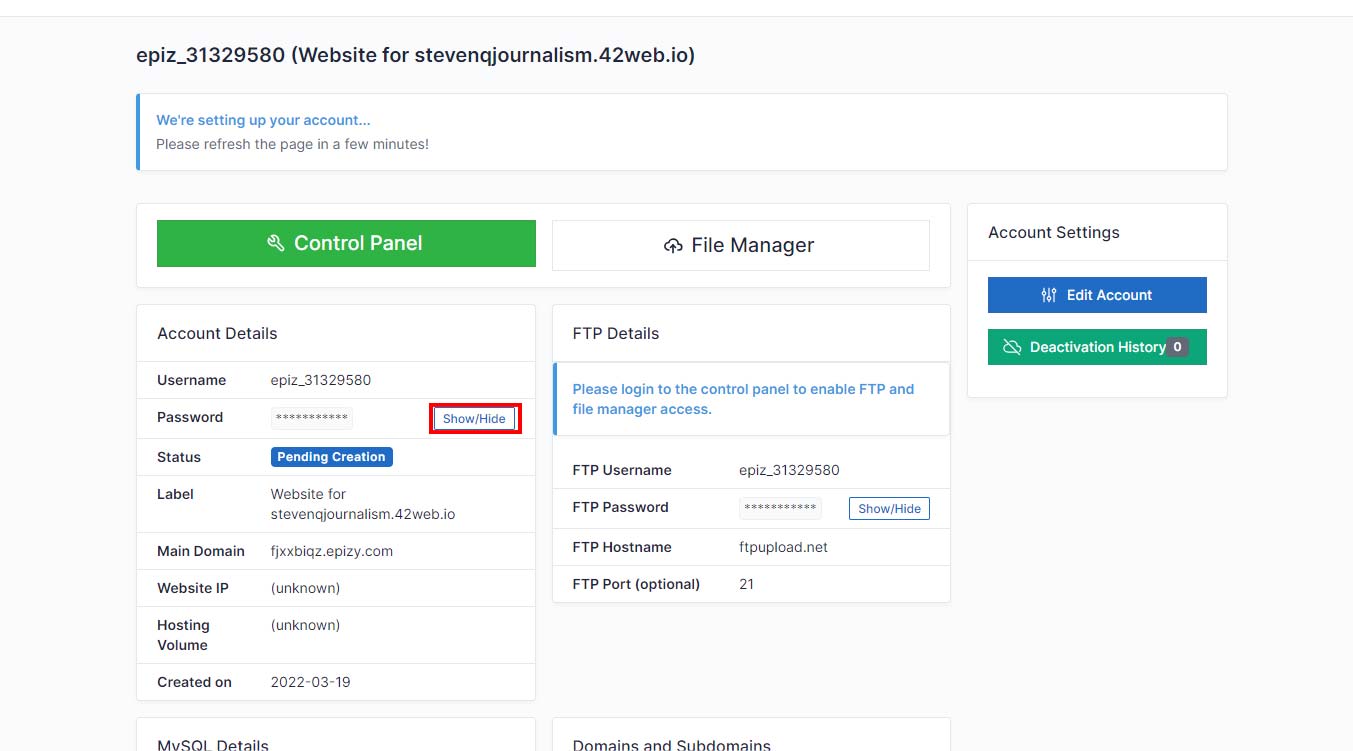
Click the button to continue and if your domain name is available, you’ll get a success message along with some more fields to fill out. This information is likely going to be for account management, so you can leave “Account Label” and “Account Username” as their default. Create a secure password (or leave it blank to have a password generated for you), click the captcha to verify that you’re not a robot and then click “Create Account”. If you leave the password blank, you can retrieve your password on the next screen by following the “View in Client Area” link and under “Account Details”, you can toggle show/hide password to view your password. Your hosting account should now be active.
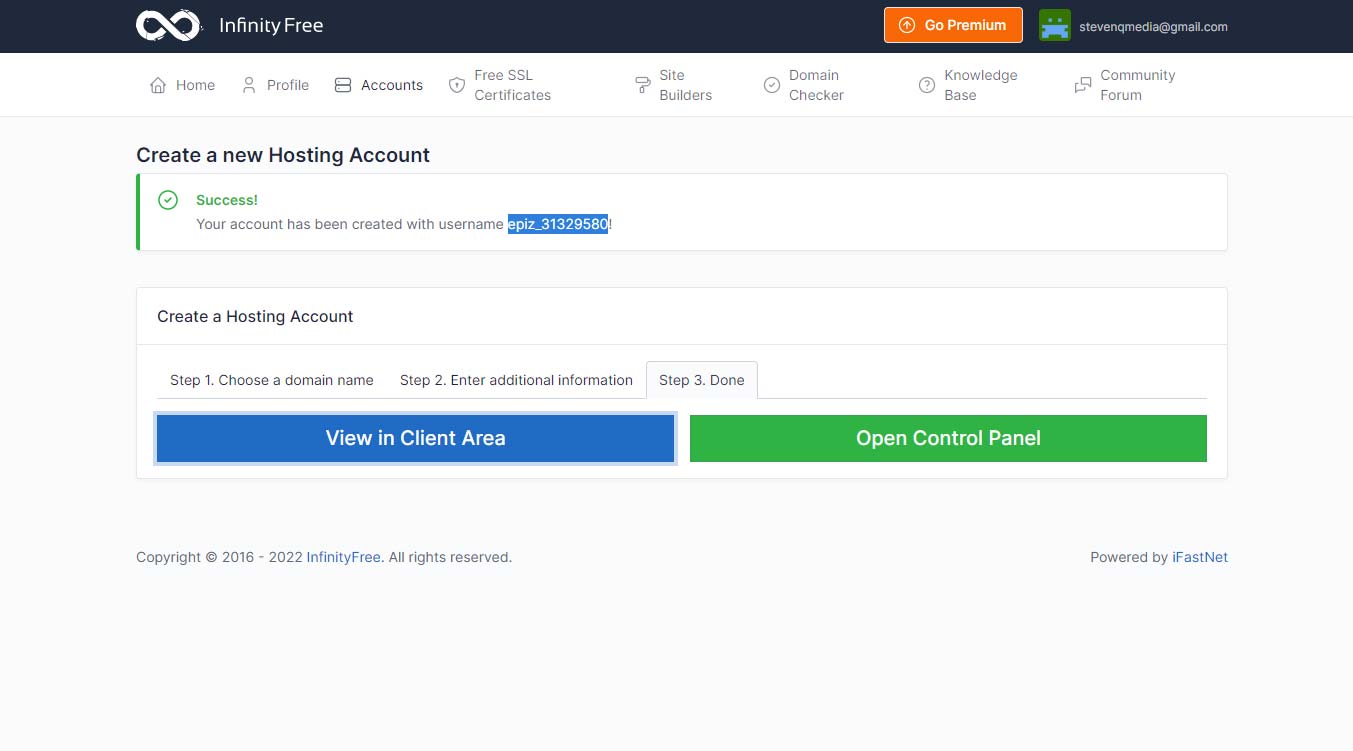
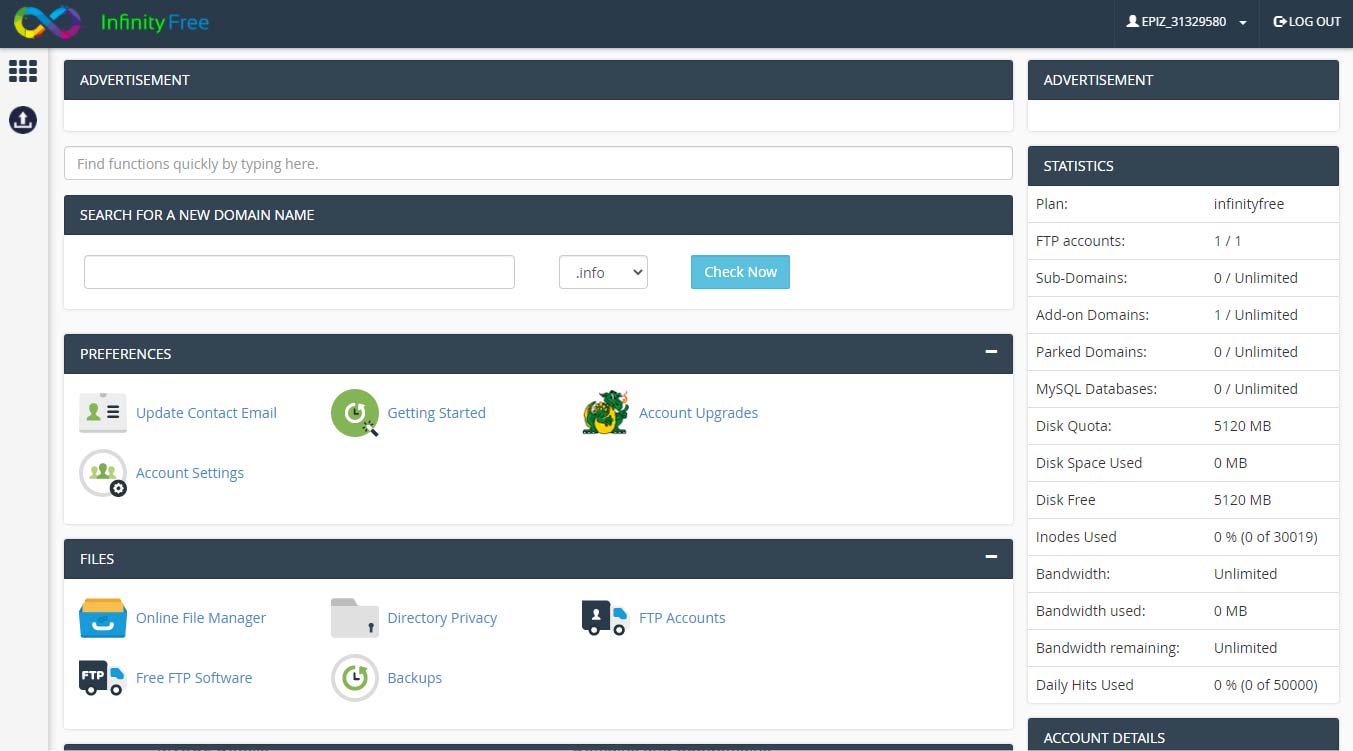
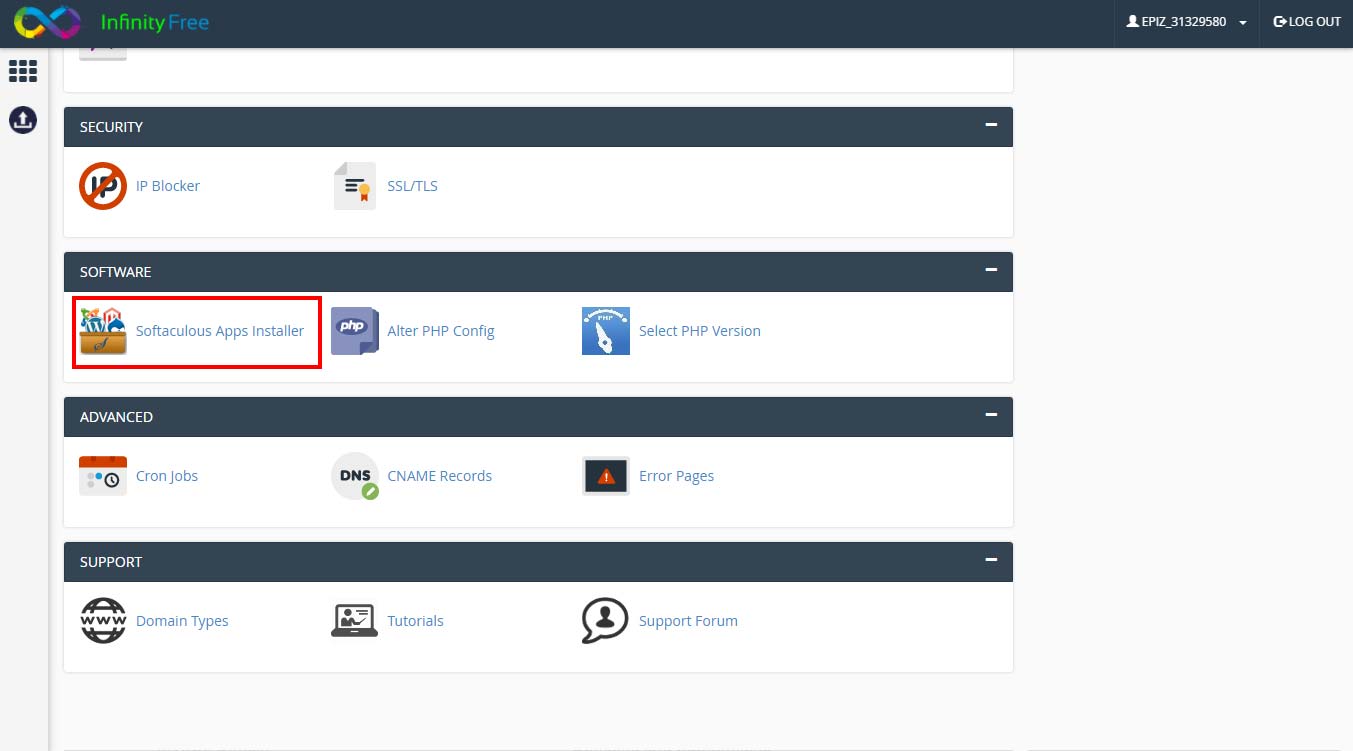
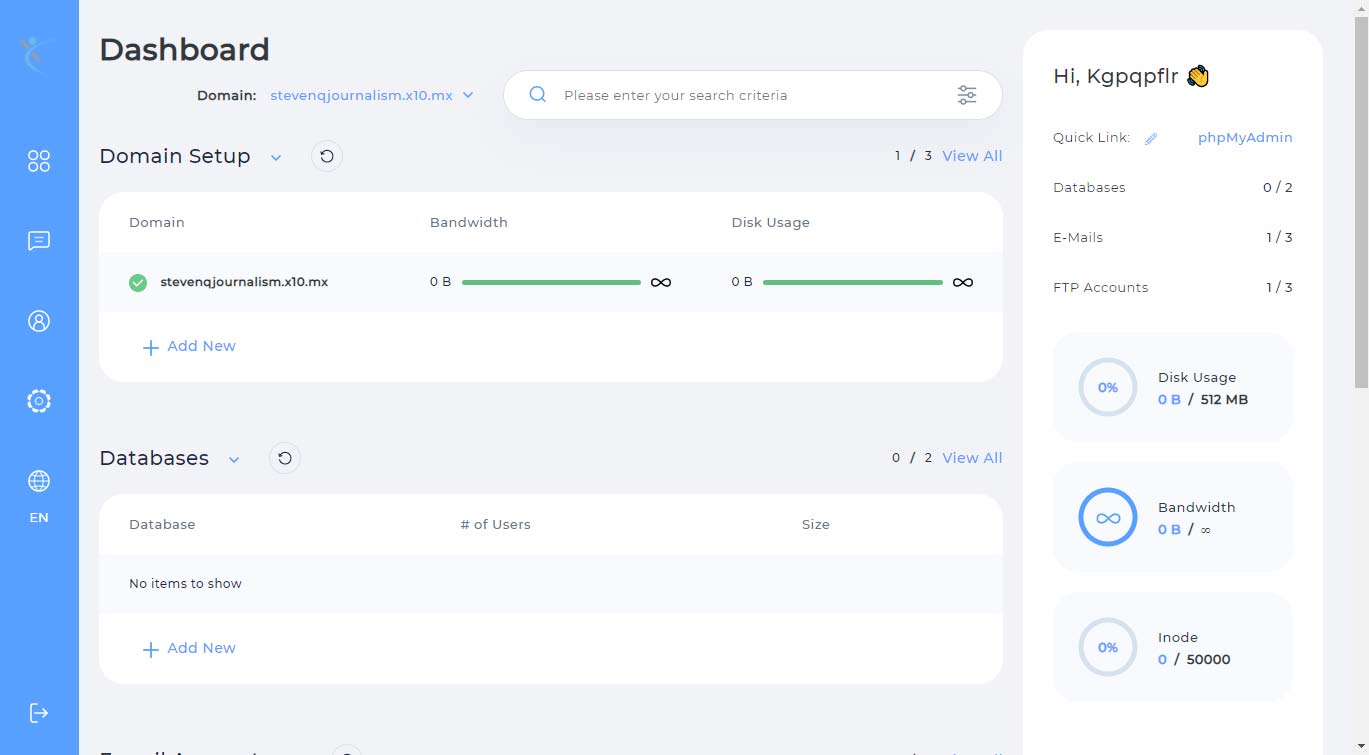
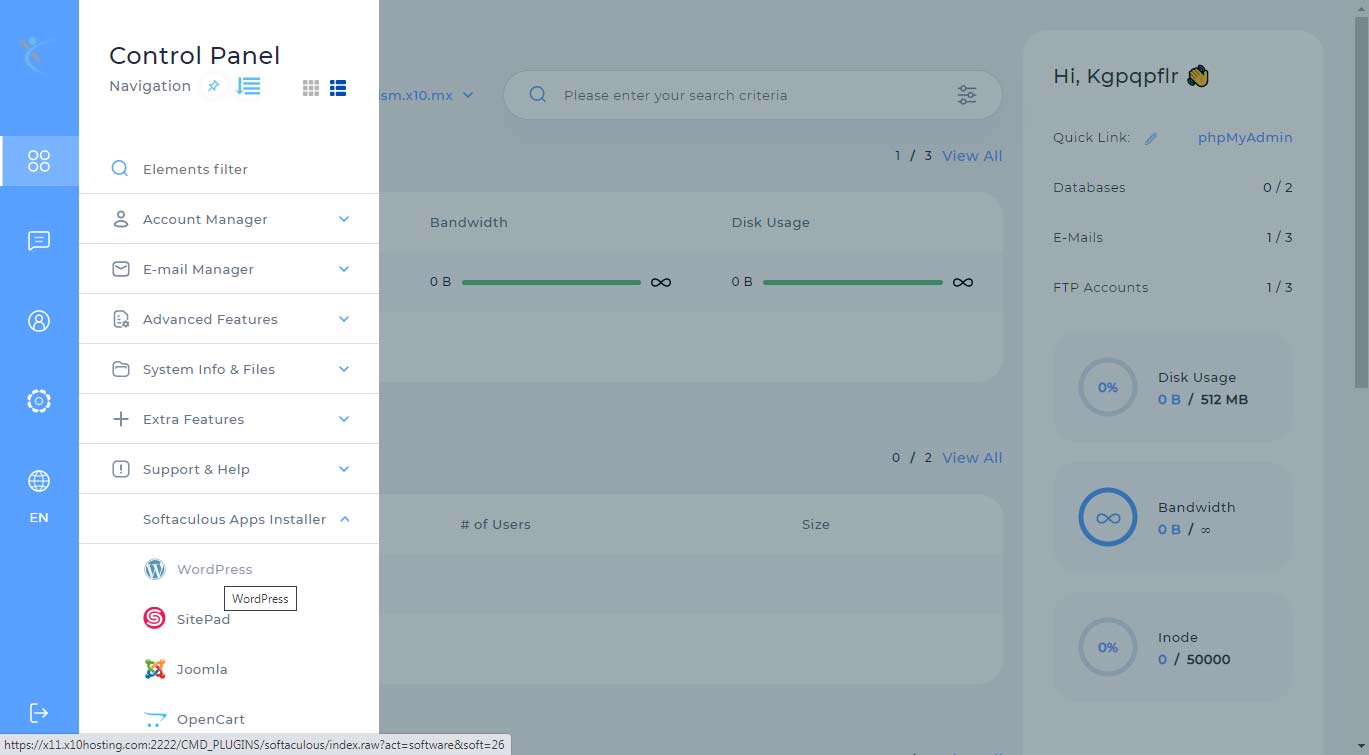
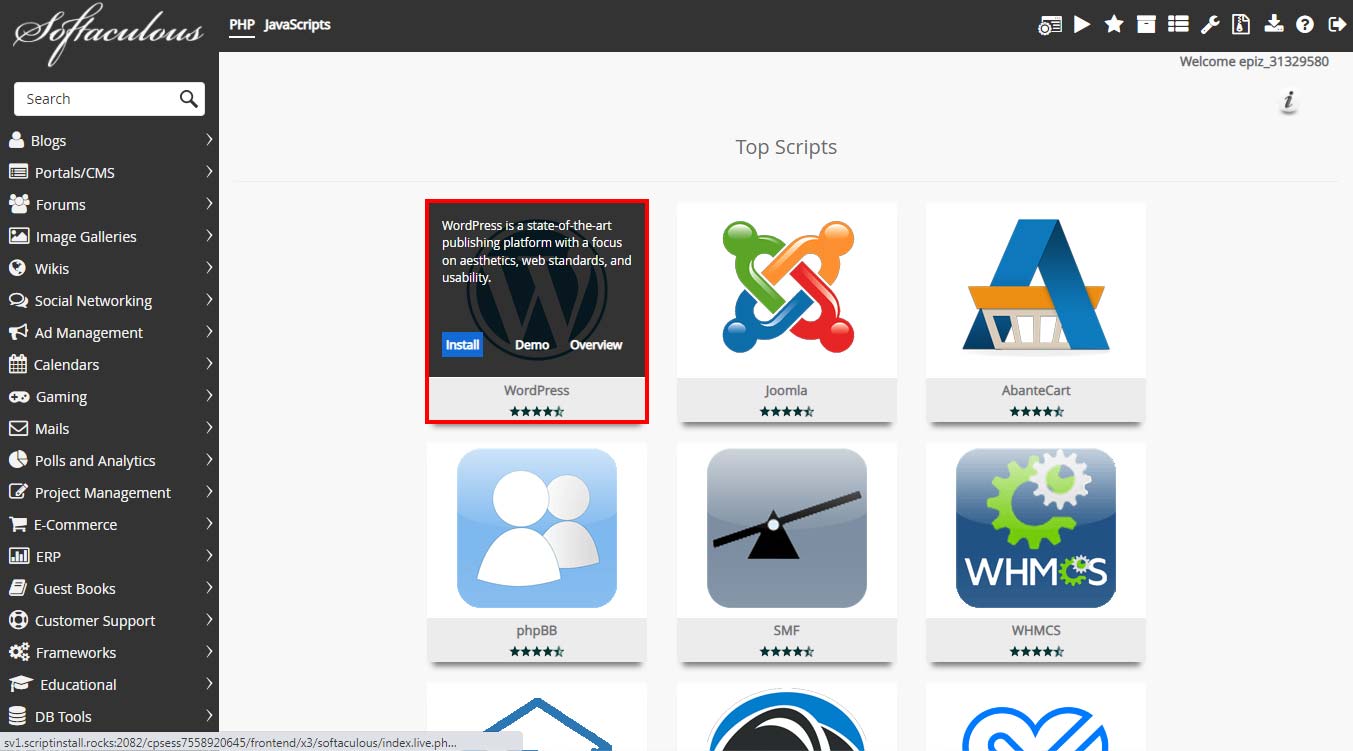
Step 4: Click the green “Open Control Panel” button to access your account cPanel. This is where we’re going to install WordPress. Scroll down to find the “Software” group and find the “Softaculous Apps Installer” link and click it. A new tab will open up with the Softaculous interface. In the main window, you’ll see a list of the Top Scripts, find the WordPress one and click the install button.
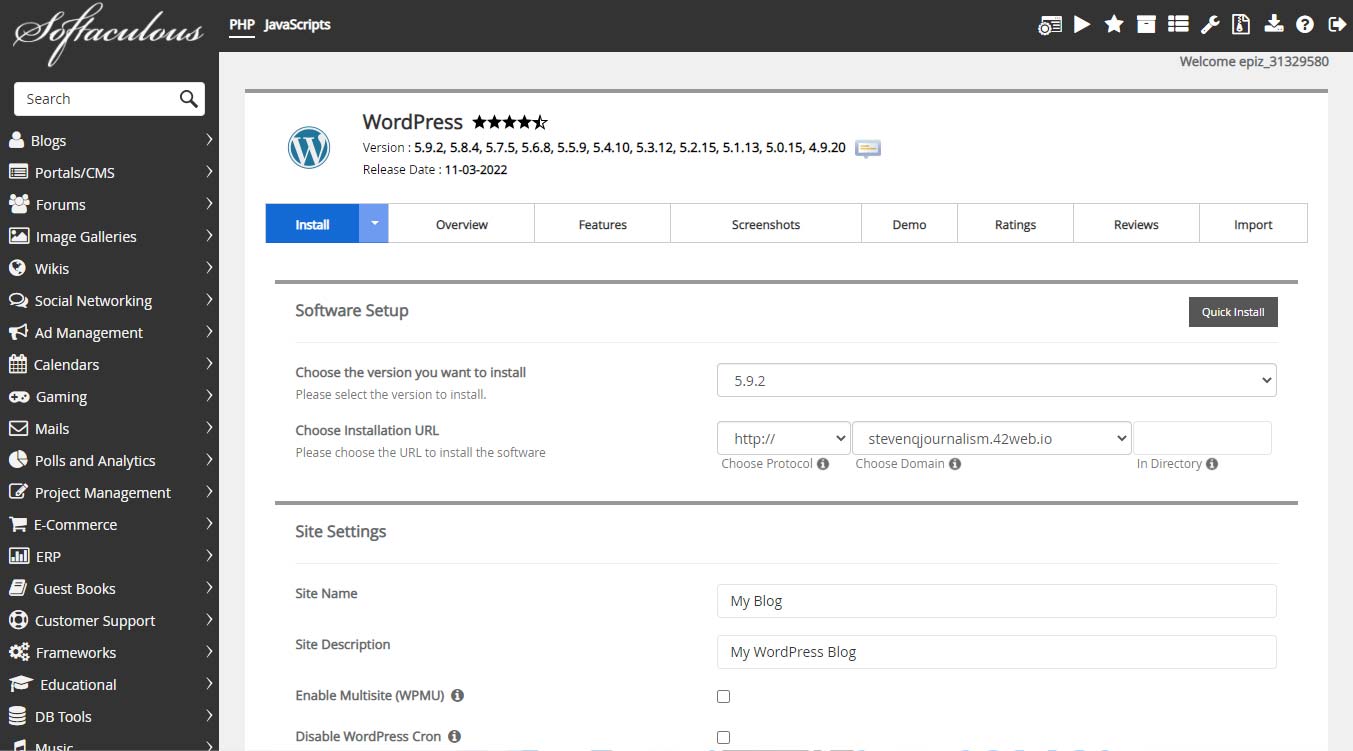
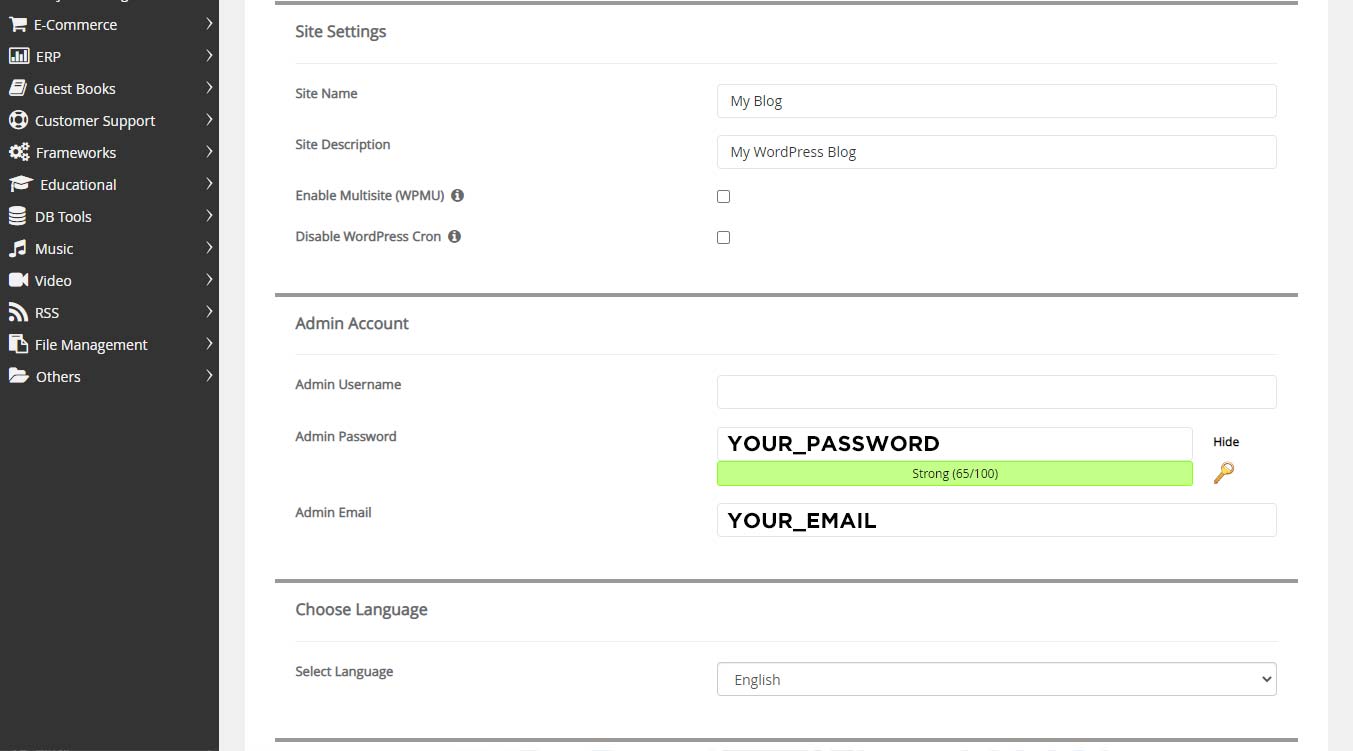
In the “Software Setup” section, leave the version as the default (it should be the latest), and leave the installation URL as the default — we want to use the root directory, so leave the “In Directory” field empty. Under the “Site Settings” section, give your site a name and a short description. Leave “Enable Multisite” and “Disable WordPress Cron” unchecked. Under “Admin Account”, create an admin username and password. Leave the other options on this page as the default and proceed to the bottom and click “Install”. You should see a progress bar of the installation and when it’s complete, you’ll see a success message along with the new WordPress site URL and the admin link.
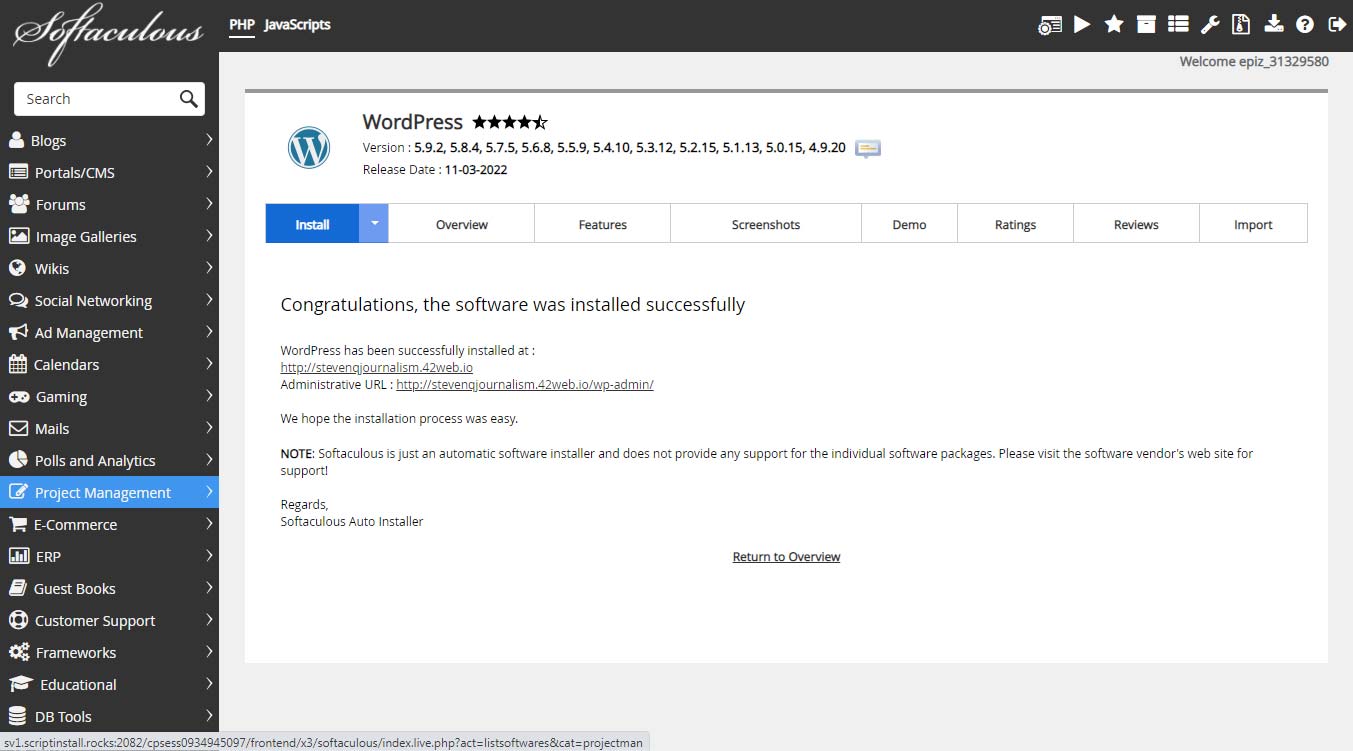
Congrats! Your new Infinity Free WordPress account is active!